You can also be interested in these:
- How to password protect a folder in Windows 11
- How to emulate Android on your PC?
- How to Disable SmartScreen on Windows 11
- How to remove Spotify ads on Windows
Skype is a popular video conferencing tool that allows users to connect with others remotely for business meetings, personal conversations, or group events. With the rise of remote work and online education, video conferencing has become an essential tool for staying connected with others. In this article, we will explain how to make a video conference in Skype, including the steps to set up your account, schedule a meeting, and invite participants.
Creating a video conference in Skype using the web browser
1. Set up your Skype account
To use Skype for video conferencing, you will need to visit the Skype website and create an account. This is a free and easy process that can be completed by visiting the Skype website and clicking on the “Sign up” button. You will be prompted to provide your email address and create a password. Once you have created your account, you will be sent a confirmation email. Click on the link in the email to confirm your account and log in to Skype.
2. Schedule a meeting
Once you have set up your Skype account, you can schedule a video conference. To schedule a meeting, click on the “Contacts” tab in the Skype menu and select “Schedule a Meeting.” You will be prompted to enter the details of the meeting, such as the date, time, and duration. You can also invite participants to the meeting by entering their email addresses or Skype usernames.
3. Invite participants
Once you have scheduled your meeting, you can invite participants by sending them an email or a Skype message with the meeting details and a link to join the conference. You can also invite participants directly from the meeting scheduler by clicking on the “Invite” button.
4. Join the conference
When the scheduled time for the conference arrives, you and your participants can join the conference by clicking on the link in the email or Skype message or by clicking on the “Join” button in the meeting scheduler. Once you have joined the conference, you will be prompted to turn on your video and audio. You can also share your screen or use the chat feature to communicate with other participants during the conference.
5. Have the ability to record the conference
Skype allows you to record your video conference, which is useful if you want to save the conversation for future reference. To record the conference, click on the “More” button in the meeting scheduler and select “Start Recording.” Once the conference is over, you can access the recorded video by clicking on the “More” button again and selecting “View Recording.”
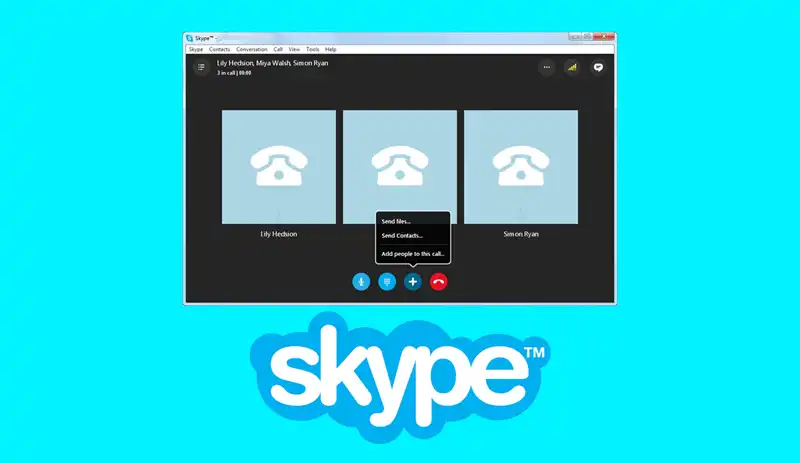
Creating a Skype video conference on the Windows application
Follow these steps to create a video conference on the Skype Windows App:
- Download and install the latest version of Skype on your Windows computer.
- Once installed, open the Skype app and sign in with your account. If you do not have an account, you can create one for free by clicking on “Create account” and following the prompts.
- To start a video conference, click on the “Contacts” tab in the Skype app.
- In the Contacts tab, search for the contacts you want to add to your video conference. You can add up to 50 people in a single video conference.
- Once you have selected the contacts you want to add, click on the “Video call” icon. This will send an invitation to your contacts to join the video conference.
- Your contacts will receive the video conference invitation in their Skype app and can join by clicking on “Join call”
- Once all participants have joined the call, you can start the video conference by clicking on the “Video call” icon.
- If you want to add more people to the video conference, you can do so by clicking on the “Add people” button located at the bottom of the screen.
- During the video conference, you can use the various controls such as muting and unmuting your microphone, adjusting the volume, and switching your camera on and off.
- To end the video conference, click on the “End call” button located at the bottom of the screen.
This might be understated, but in order to make a video conference in Skype, all the participants should have a webcam and microphone, and a stable internet connection.
Creating a Skype video conference using your phone
On mobile, creating a video conference using the Skype app is slightly different, yet not so complicated. Follow these steps:
- Download and install the Skype app on your mobile device.
- Open the app and sign in with your Skype account.
- Tap on the Contacts icon at the bottom of the screen.
- Search for the person or group you want to have a video conference with.
- Tap on the contact or group and select the Video call icon.
- Make sure you have a good internet connection, and that your device’s camera and microphone are enabled.
- Wait for the other person or group to answer the call.
- Once the call is connected, you can start your video conference. You can use the microphone and camera on your mobile device to talk and see the other person or group.
- To end the call, tap on the red hang-up icon on the screen.
To make a group video conference, you’ll need to create a group in Skype first. To do this, go to Contacts > Create Group, and then invite the people you want to include in the conference.
In conclusion
In conclusion, video conferencing has become an essential tool for staying connected with others in today’s digital world. Skype is a popular video conferencing tool that allows users to connect with others remotely for business meetings, personal conversations, or group events. Setting up a Skype account, scheduling a meeting, inviting participants, joining the conference, and recording the conference are the essential steps in making a video conference in Skype. With these steps, you can now conduct a seamless video conference on Skype and stay connected with your colleagues, friends, or family members.
More stories like this
- How to password protect a folder in Windows 11
- How to emulate Android on your PC?
- How to Disable SmartScreen on Windows 11
- How to remove Spotify ads on Windows
- How to set up BIOS to boot your PC from USB
- Installing ChatGPT on Windows 11 as a local application