You can also be interested in these:
- Thermaltake View 300 MX full review
- Antec P20CE E-ATX PC case full review
- Intel NUC 13 Extreme Mini ITX barebone full review
- Corsair iCUE H150i ELITE LCD XT full review
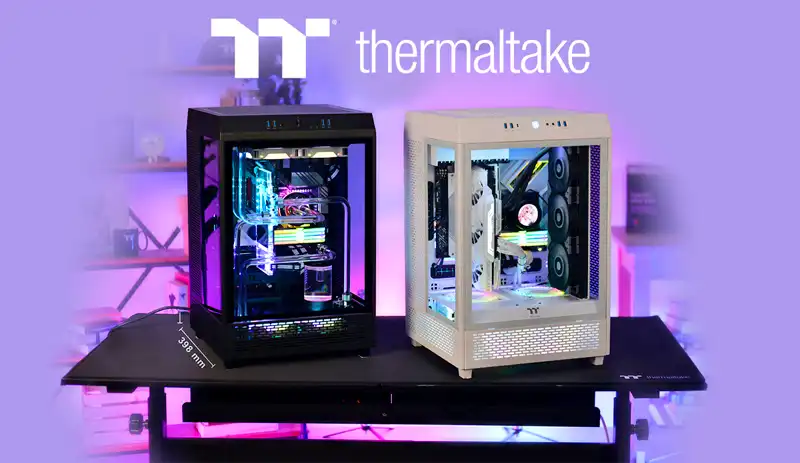
Today, we are introducing the Thermaltake The Tower 500, which is a semi-tower format case that seeks to expand and enhance the features of the 100 Mini model for ATX and E-ATX motherboard setups. The most notable feature of this case is its unique cube-like design with three glass panels and ample interior space for the vertically-mounted motherboard.
Thermaltake specializes in producing distinct cases that enable PC builders to unleash their creativity by incorporating custom liquid cooling systems with multiple radiators, front panel display add-ons, or RGB strips. All the compartments come with dust filters, the panels are rotatable, and it includes two integrated fans. The prospects for this case seem highly promising, and we are eager to see if it can deliver on its potential.
Exterior design
The size of the Thermaltake The Tower 500 is nothing short of “monumental,” standing over 60cm tall, which makes it almost suitable for use as a chair if its top were more sturdy. It is available in the brand’s customary white and black colors.
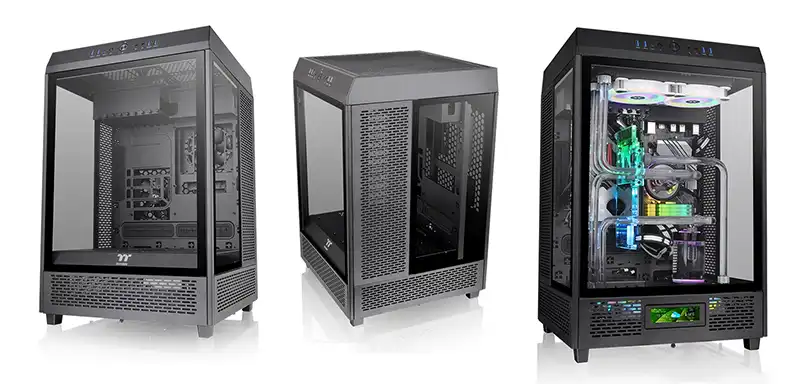
Starting with the front panel, it has an enormous 4mm thick tempered glass panel that is completely transparent, with a black opaque frame to conceal the fastenings to the chassis. The fastenings consist of basic metal tabs that snap into place, which implies that we must detach the top part to extract it.
Located on the top of the case is the front I/O panel, which includes the following components:
- Power button with an integrated LED
- Reset button
- 1x USB 3.2 Gen2 Type-C
- 4x USB 3.2 Gen1 Type-A
- 2x 3.5mm audio jack for headphones and microphone
Just below the front I/O panel, there is a metal panel with a rectangular grille and an internal particle filter, which is secured using a lower screw and lateral tabs. To add a more exciting touch to our setup, we can replace it with the separately sold LCD screen kit. It is a smart decision to leave space at the bottom for air intake towards the PSU and primary compartment.
Moving to the side areas, they are identical, each consisting of two mixed panels of 4mm tempered glass and a metal area with a grille and particle filter. The fastening system is identical to the front panel, necessitating the removal of the top part to extract them.
The panels are fully interchangeable, allowing us to relocate the grille to the front area if we need to install a vertical liquid cooling radiator, which is precisely what our case requires. Again, at the bottom, there are metal covers with filters and screw fastenings for air intake.
Moving on to the rear area, we can observe a distinct feature of the Thermaltake The Tower 500. It uses a steel plate with a large central opening and a dust filter to exhaust air from the rear fans while cooling potential hard drives. The plate is secured with lower tabs and two upper screws, with a lower cutout for the power supply. The central area has no fasteners, but it is robust enough to withstand cable pressure if necessary.
The top area of the Thermaltake The Tower 500 is significant as it not only exhausts air but also houses the nine expansion slots and the port panel for the motherboard. These accesses are deeply recessed, making it challenging to reach with a hand.
Utilizing the remaining space, there are areas for radiators or fans and cable routing from the I/O panel. Multiple holes are available to pull out the cables from the motherboard, so cable management should not be an issue. The top cover features a grille and particle filter that is fixed with pressure points, which only requires a push to lock or unlock access.
Lastly, the bottom area of the chassis has four legs in the corners, an air intake area for the power supply with a particle filter in a plastic frame, and a second air intake area with a magnetic filter.
Capacity and interior
We begin by removing all the covers of the Thermaltake The Tower 500 to reveal an interior compartment divided into the main hardware area, rear area for cables and storage, and bottom area for air intake, fans, and PSU. The distribution is rather unconventional and unique, creating an entire gaming room for those who enjoy tinkering.
Starting with the main space, it supports Mini ITX, Micro ATX, ATX, and E-ATX format motherboards up to 305×305 mm. The innovative feature here is that it adopts an upside-down vertical position, meaning the port panel faces upward, along with the expansion slots. As a result, the cable routing holes are also rotated 90 degrees clockwise, with two at the bottom and one on the left with rubber covers. We will also notice how the two pre-installed fans are placed behind the motherboard, improving its cooling but generating a low airflow.
The PSU compartment is divided by two steel plates with a grille that we can remove easily by taking out the four screws that hold them. These plates support the installation of fans up to 140 mm or hard drives, which will determine the available space for graphics cards since with them, the maximum length will be 325 mm. Removing them, however, expands it to 355 mm, although there will be exposed cables and the PSU. There won’t be any issues with the CPU cooler since it supports up to 275 mm in height.
On the same plates, we can also install a radiator up to 360 mm using the two included adapters, which we will fix with screws at the bottom and top. The typical position will be on the right side to leave free space for the motherboard’s expansion slots.
Cable space and storage capacity
Continuing with the internal examination of the Thermaltake The Tower 500, we move to the PSU area, a space below the primary compartment where we can install fans or store a large number of cables. With efficient cable management, both elements can coexist with minimal difficulty.
If we look at the back, there is roughly 80 mm of space behind the motherboard to store relevant cables if we want to keep the bottom area relatively clean for fans. In principle, this area is already quite occupied, as it can house and, in fact, already has two pre-installed fans.
This is where storage options come into play, with four drive bays that can hold up to four 3.5″ HDD units. Two of them have a second level where we can install a total of four SSD/HDD units of 2.5″. Returning to the main compartment, we have the two base plates where we can install either two 3.5″ units or four 2.5″ units, provided we do not place a vertical radiator. In that case, we would be limited to one 3.5″ HDD or two 2.5″ HDDs.
Cooling capacity
The Thermaltake The Tower 500 has a significant capacity to install various ventilation elements, making it suitable for custom cooling systems. It comes with two pre-installed 120mm fans at the back.
The available space for fans is as follows:
- Top: 2x 120 mm / 2x 140 mm
- Right or left side: 3x 120 mm
- Rear: 2x 120 mm / 2x 140 mm
- PSU cover: 2x 120 mm / 2x 140 mm
- Bottom: 2x 120 mm
We would move the two pre-installed fans to the top. Still, since we have also analyzed the Thermaltake Swafan 12 and 14 RGB fans simultaneously, we have utilized several spaces for them, including the top with two 140 mm units and the front gap with another two 120 mm units.
The available space for radiators is as follows:
- Top: 240 / 280 mm
- Right or left side: 360 mm
- Bottom: 240 mm
Looking at each space in detail, we believe that the back has little usefulness as it is partially covered by the motherboard. Instead, we prefer to use the top space either with fans, as in our case, or with a radiator. It is a space that will significantly benefit the extraction of air from the chassis and provide good aesthetics with RGB elements. It supports practically unlimited thicknesses, except when installing a 360 mm radiator on the side.
In fact, we move to that peculiar lateral position within the main compartment, where we need to use the two metal rails that we must install in the designated holes with screws. It is a somewhat tedious procedure, as they can move quite a bit even when fixed, and we may get confused about which hole to screw them into. Moreover, they are a bit separated from the side more than we would like. It would have been easier if we could install radiators directly on the grille areas on the side windows, thus doubling the capacity easily.
The bottom area will have enough room to install fans on the horizontal plates, at the front, or even at the bottom, although these two spaces will be exclusive of each other. Please note that to install fans in this area, we must first remove the plates to allow access.
Our full Thermaltake strategy is to install RL and fans from the brand in a configuration for a standard gaming PC. If we plan to mount a custom liquid cooling system, it could be as follows: a water reservoir on the PSU cover or vertical if it is an acrylic block, a 280 mm radiator at the top, and a 240 mm radiator at the bottom, or we could place another radiator vertically on the right and the reservoir on the left.
Final words and conclusion about Thermaltake The Tower 500
This PC case is so different from the usual ones, with so many possibilities to build our setup and such a particular style. However, we must have a fondness for tinkering and slightly more laborious assemblies, but the results are definitely worth it.
The most notable technical strengths of this chassis are numerous: the large size and visual spaciousness provided by the glass windows, whose sides can be swapped. It offers good manufacturing quality, modularity for mounting fans, radiators, or storage, and plenty of space for cables. The airflow is excellent, and no component will overheat, that’s for sure.
However, there are also some imperfect details, such as having to remove the roof to remove the windows. If it had hinges like a horizontal door, it would look great. The port cutout on the motherboard is pretty hidden, and there isn’t much space at the top for large radiators. We feel that the lateral space could have been better utilized by adopting direct radiator mounts on the side covers instead of those rails that are somewhat in the middle of the enclosure.
More stories like this
- Thermaltake View 300 MX full review
- Antec P20CE E-ATX PC case full review
- Intel NUC 13 Extreme Mini ITX barebone full review
- Corsair iCUE H150i ELITE LCD XT full review
- FSP Technology Hydro GT Pro 1000W PSU review
- What is a Barebone Gaming System: Is it any good?