You can also be interested in these:
- Zelda BOTW Ishto Soh Shrine full guide
- Zelda BOTW Shae Loya Shrine full guide
- Zelda BOTW Sheh Rata Shrine full guide
- Zelda Breath of the Wild: The Shee Vaneer Shrine guide
The legend of Zelda, Breath of the Wild, an action game that was launched in 2017 from the creators of the massive Super Mario franchise: Nintendo. This is, as part of the legend of the Zelda franchise, another masterpiece in it all itself. People love Zelda games because its console-type gaming mechanics with a single-player option. On this adventure, the hero, as usual, is Link, who is awakened from a hundred-year slumber to defeat his evil nemesis Ganon, and lastly save the Hyrule kingdom.
This game is massive. The map of the entire game totals roughly 84 square kilometres. That is a lot of area to cover. The size of the game is a bit big as well, around 15GB. You have the option play via cloud gaming. Even so, this game is a delight to play. It is full of adventures and there is no a single thing that can be considered waste of time or resources. You can explore the whole map by doing the different tasks, but you do it at your own rhythm and when you feel like doing it, mainly because of its no-linear kind of nature.
Moreover, the tasks are quite interesting and rewarding at the same time. Like this, there are some caves where you have a puzzle. After solving the puzzle you get a reward like swords or any other special power. All this loot will come in handy at a later stage of the game, where depending on all the perks you collect the chances of beating the game without major complications will increase.
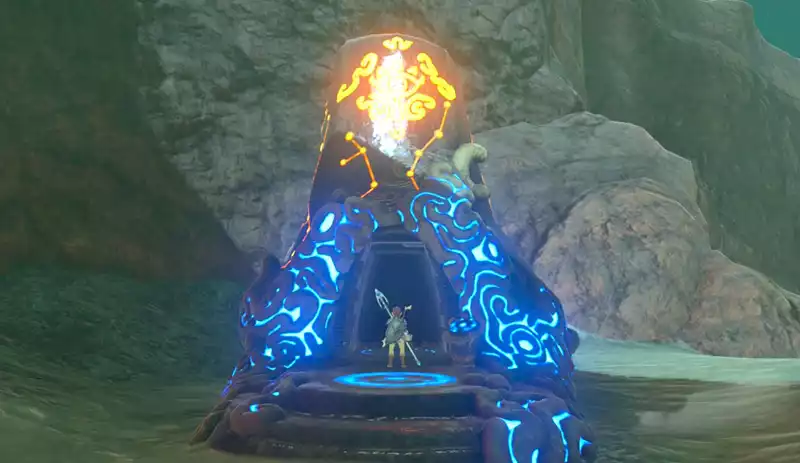
The BOTW Mirro Shaz Shrine
On this instalment, we will be reviewing the BOTW Mirro Shaz Shrine. This in-game location poses an interesting challenge for everyone who ventures in. This is not a difficult dungeon to beat, and depending of your skill level, doing so can be a walk in the park. What you do need though is to be somewhat familiar with the puzzles you will find to ensure an enjoyable and safe journey.
Location
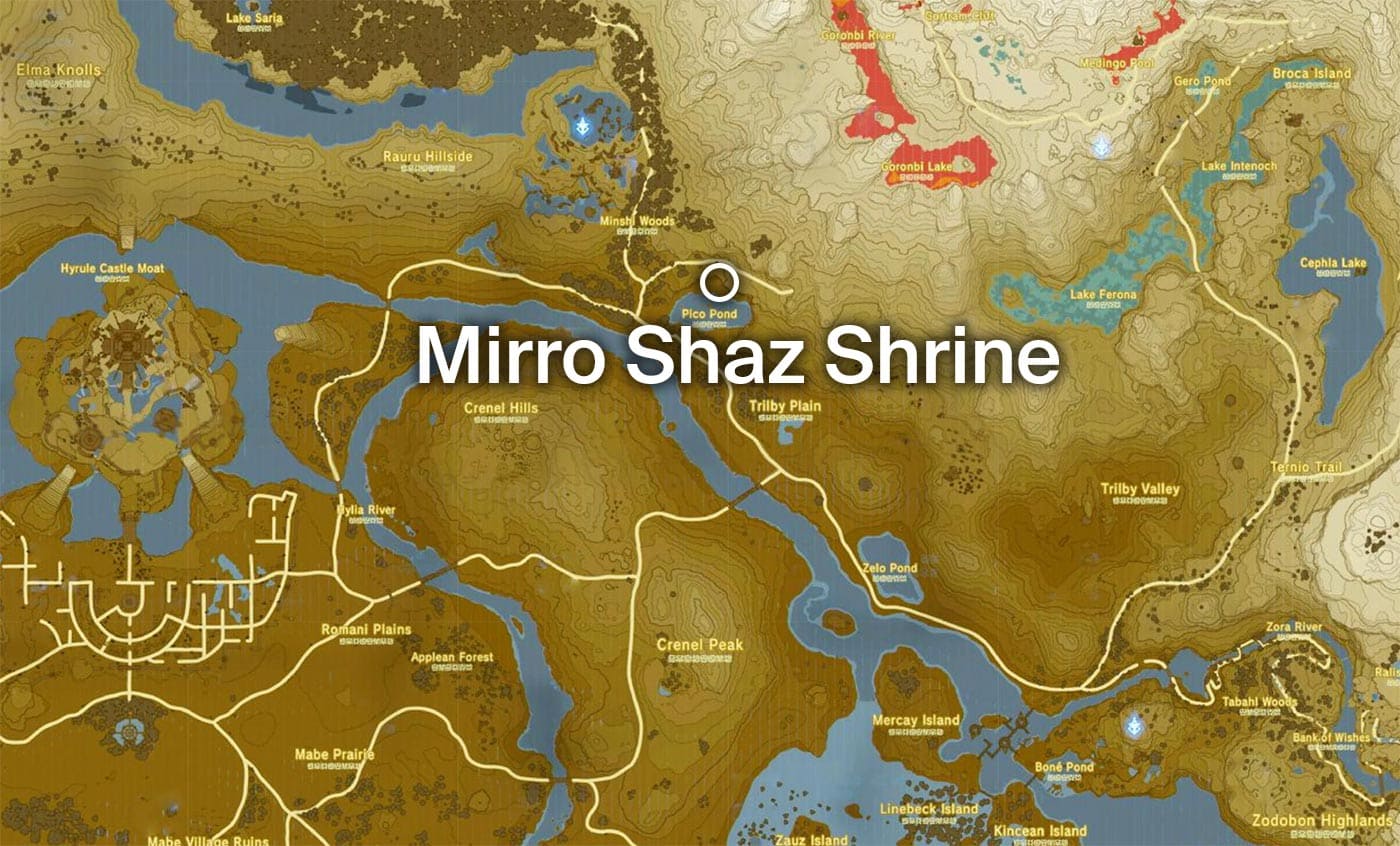
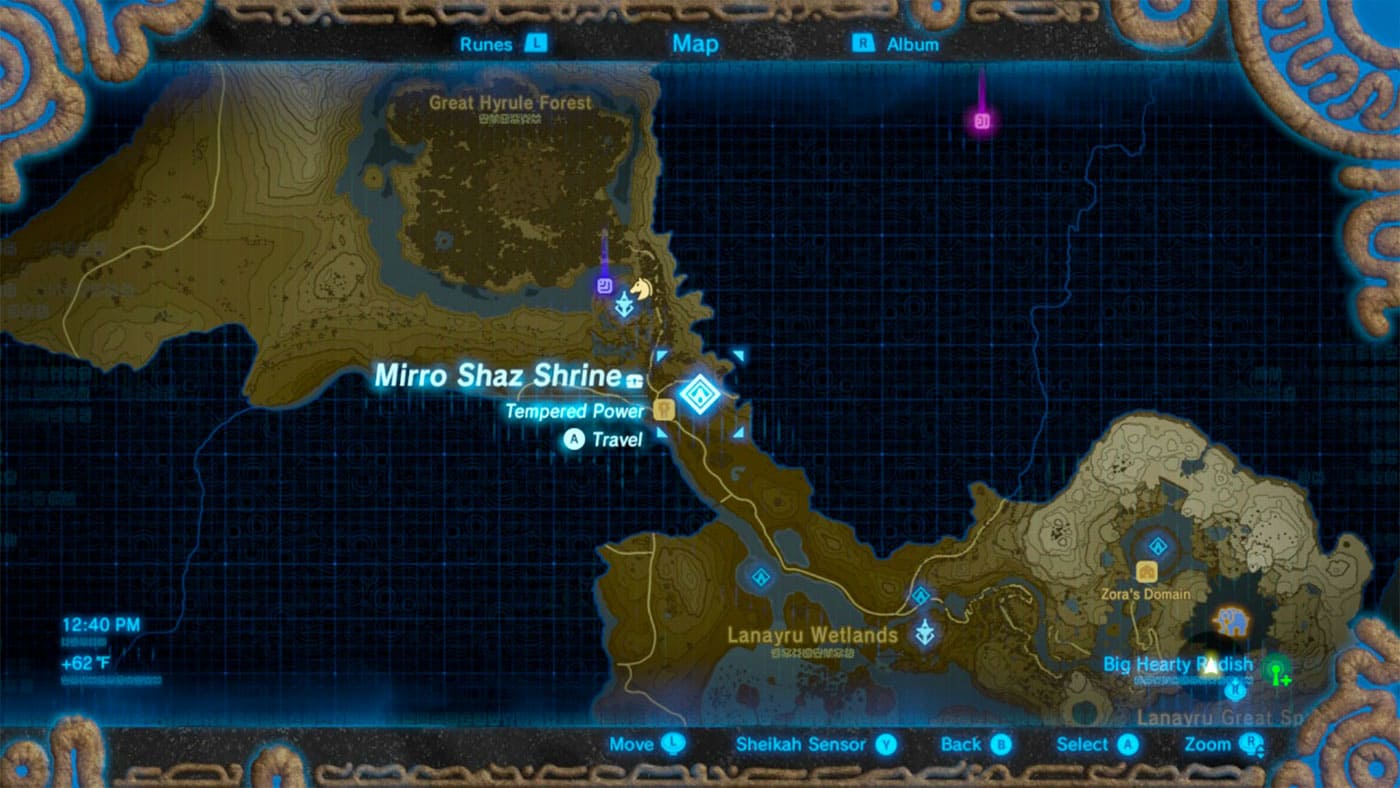
You can find the BOTW Mirro Shaz Shrine near the central part of Hyrule forest, close-by the Woodland Tower. This Shines is one of the easiest locations to get in terms of accessibility. On the other hand, traversing through its obstacles without the proper guidance might not be so easy.
Once you reach the shrine, you need to unlock or “activate” the shrine gate to gain access. After that you can enter the first room on the shrine through an elevator. You will hear the voice of a monk who will introduce you to the maze and give you a few other informations. Here in this room, you will find the first challenge to proceed to the second room.
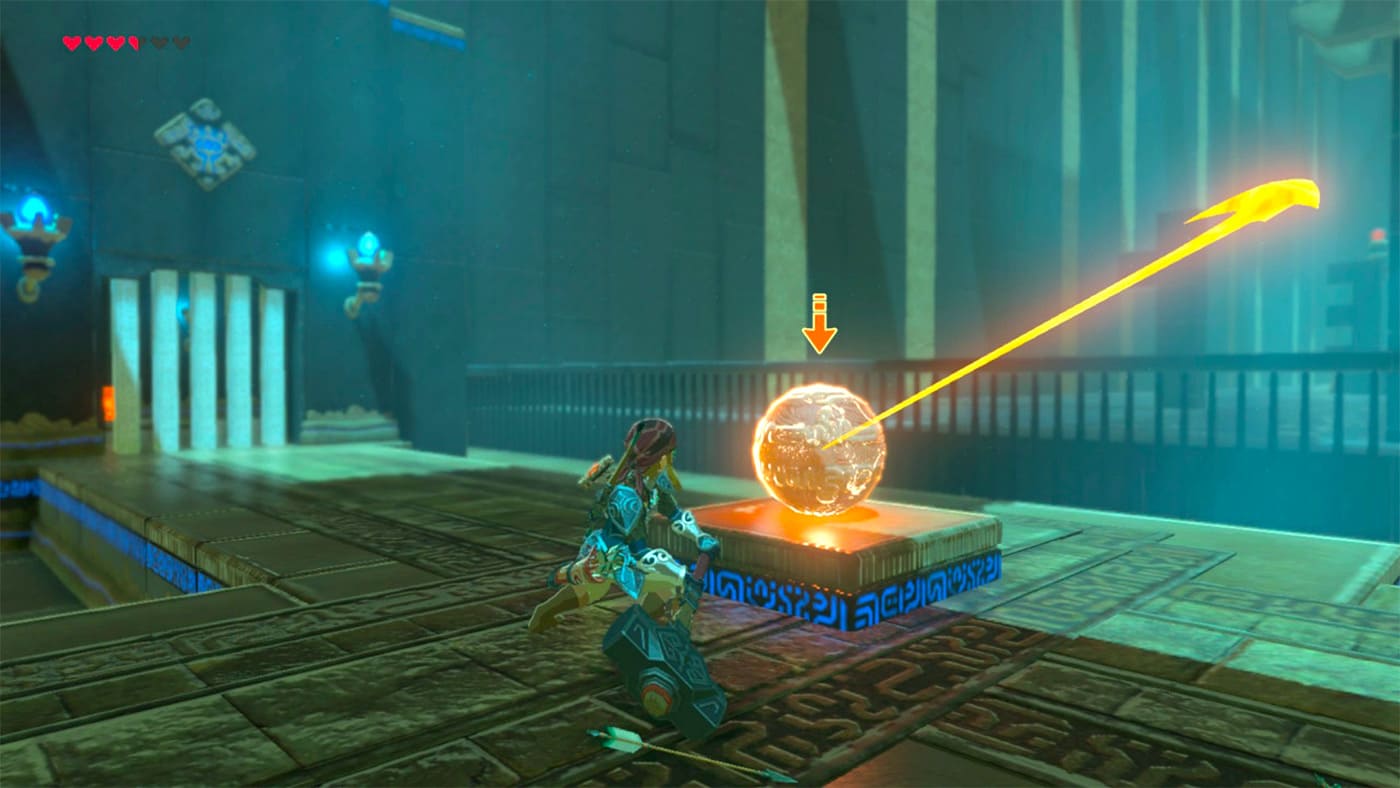
The ball and the iron sledgehammer
On the left side, you will see your a treasure chest, a ball in the center, and a reset key on the right. First off, open the chest and collect your reward which will be an iron sledgehammer. Afterwards, be ready to hit the ball with the latter. You need to be aligned perfectly along the line between the ball and the hole right in front of it.
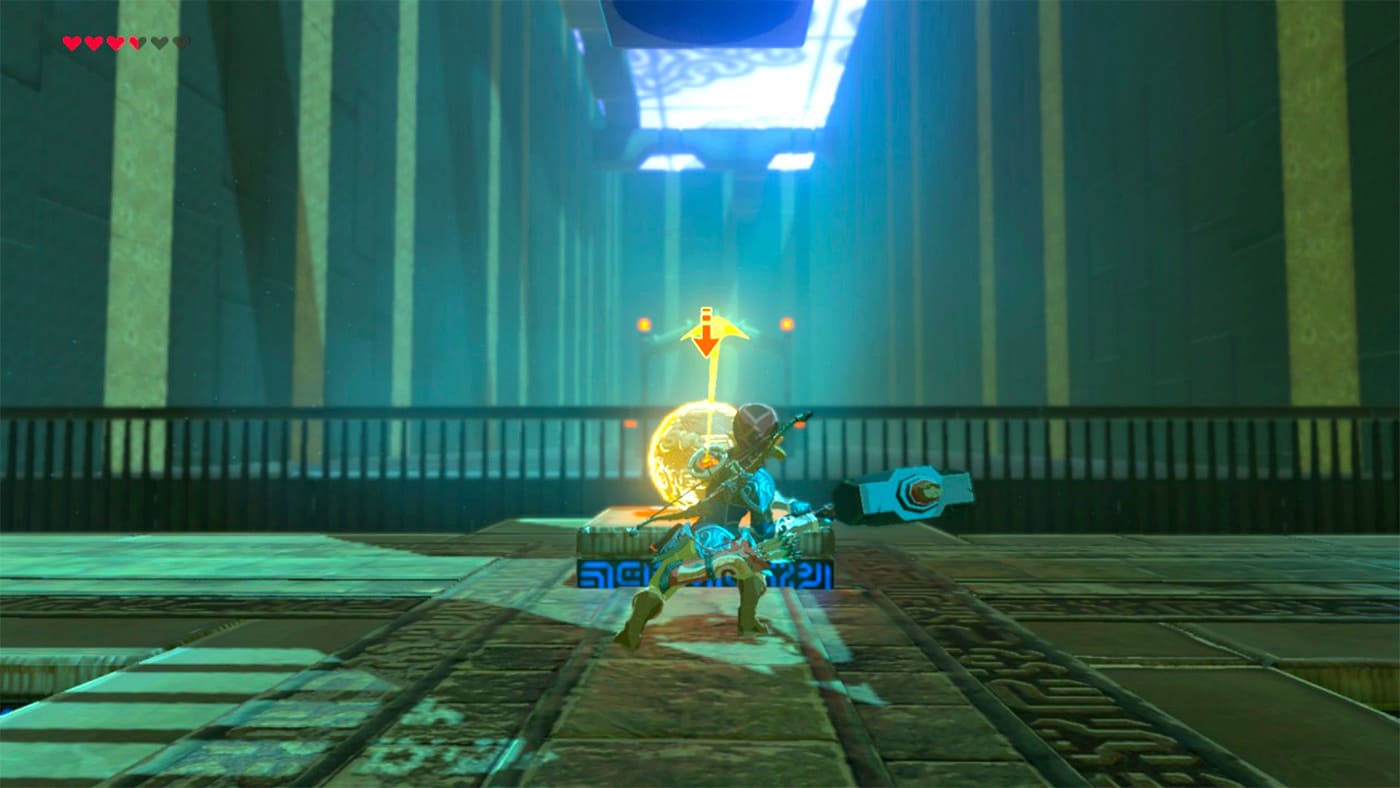
You need to hit the ball exactly 5 times, although the exact same number of hits will depend on the item you have equipped. It won’t be more than 6 times. You should use Stasis on the ball then hit it with the iron hammer to get it in the hole in just one try. If you fail the the shots, you can activate the button on the right side of the room to reset the ball. Once you have completed the task with a successful hit the door to the second room will open. You shall proceed to the next challenge.
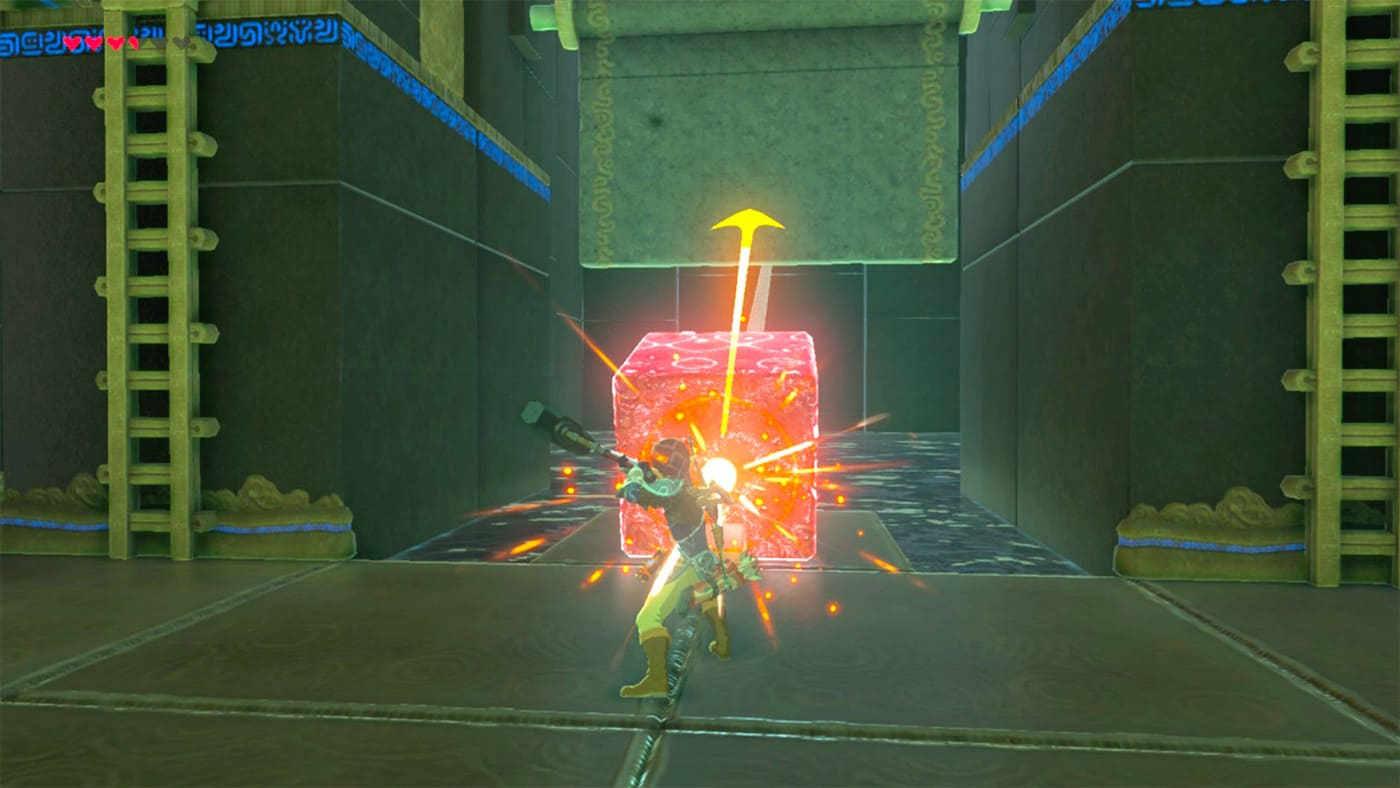
The rock and the bridge
Here, you will see a big rock tightly chained to the big bridge door. To complete this challenge and to move forward, all you need to do is take out that iron sledgehammer and hit the rock until the last hit sends the rock flying along the ramp. After that, you will notice a bridge will fall down on top of the rock. Climb those stairs to reach that big bridge. Now jump on the bridge and proceed through.
Here at this point, you will see the old monk covered in a blue shield. Don’t go to the monk now, you will have visit the monk near the end after completing all the challenges. Instead, go to the left in the small passage and there you will see an elevator. Use that elevator and go down to the next challenge. You will have the opportunity to have another iron sledgehammer, take it, as you will need a newly fresh hammer for the next task.
Rinse and repeat
Delving into the depths of the BOTW Mirro Shaz Shrine, you will find your third challenge. Here you will have the same setting as the challenge number one, but the requirement is a bit different. This time, you need to achieve hit the ball 5 times with the iron sledgehammer, and quickly switching to another one-handed weapon (it can be a sword or even a boomerang) and hit the ball one more time with that weapon. Again, the number of times you have to hit with the second weapon depends on what you use. After a successful sequence the ball will be launched in the direction you were hitting. You can optionally use Stasis on the ball.
Before starting this last challenge save your game, in case the iron sledgehammer breaks on you, you can always return to a safe spot. If you miss one of the shots, as the first challenge, you can always reset using the button on the right side of the room.
Once you succeed in this, the chest entrance will open up. From this new chest you will get the giant ancient core. Now you can return back to the monk.
The monk
After finishing the third challenge, get back to the monk via the elevator. Here you will observe a monk sitting on a bright blue shield. Stand in front of the blue shield and press the switch to open the shield. The shield will vanish out into pieces and a slow-motion cut scene will play. Now the monk will reward you with the spirit orb. After speaking for a while the monk will disappear and your task will be completed.
The Shrine locations in Zelda Breath of the Wild
Like the BOTW mirro Shaz shrine, there are many other shrines like: great Hyrule forest shrine, Daag Chokah shrine, Ketoh Wawai shrine, Keo Ruug shrine, Kuhn Sidajj shrine, Maag halan shrine, monya Toma shrine, Rona Kachta shrine, among many many others. All such shrines have different tasks and you need to use different techniques to clear all these tasks one by one. This game has not just shrines, also some other places highlighted on the map that you can check out as well. The average total gameplay time the game story has is around 50 hours. One can easily complete this game within this period and have a blast while doing so.
Should you purchase Zelda BOTW?
This game is a masterpiece. The answer to this question is as assertive and exiting as it can be: a big loud yes. This game is a universe in itself. The price point (of USD $60) is little, compare with the real value you will get out of this: hours of fun. This game also supports different languages as well. Like Russian English, Japanese, French, German, Italian, Dutch, and Spanish. You can play this game on three different devices also termed as three different modes to play. One is the TV mode in which you can play this on TV. The second is in tabletop mode, in which you need some controllers to play. While the third is the handheld mode in which you can play on small devices.
In conclusion
Great graphics, fluid animations and an unparalleled fun experience make the Zelda Breath of the Wild worthy of such a hype from its fan base. The price point of this game is no match for the amount of quality content we will get, and the fun factor will be there all the way through.
The BOTW Mirro Shaz Shrine is just one location from many of the game. if you follow all the guidelines on this step by step walkthrough you won’t have any issues traversing this amazingly well crafted dungeon.
More stories like this
- Zelda BOTW Ishto Soh Shrine full guide
- Zelda BOTW Shae Loya Shrine full guide
- Zelda BOTW Sheh Rata Shrine full guide
- Zelda Breath of the Wild: The Shee Vaneer Shrine guide
- Zelda: How to get the Lord of the Mountain BOTW mount
- H264 vs AV1 vs H265: What is the best video CODEC?