You can also be interested in these:
- How to fix the Microsoft system error 8646
- Fix the “We couldn’t install some updates because the pc was turned off” error
- How to change the language in Windows 11
- How to configure parental control in Windows 11
Few things in the computer world are as daunting and dreaded as seeing a blue screen on our Windows 10 operating system. This error is the blue screen of death type commonly seen when some serious problem arises in our system. In this article we will deal specifically with “the computer has rebooted from a bugcheck” error, which usually points to a recently installed driver that may have been corrupted or damaged, creating conflicts in the system.
Whenever we install new drivers and controllers on our computer we allow all the instructions in its content to modify and interact in the context of our operating system. If we notice, just after performing an installation, the error “the computer has rebooted from a bugcheck” on a blue screen, it is almost certain that it was caused by the aforementioned driver.
Below we present a series of steps with possible solutions to this problem ordered by complexity and effectiveness. The first methods on the list will be the easiest to execute, or the ones that will require the least experience possible.
Solution 1 – Uninstall and remove the peripheral that caused the problem
The most obvious option, after receiving the error “the computer has rebooted from a bugcheck” is to completely remove the drivers from the device that caused the error in the first place. As we have already mentioned, it is very likely that this error happens just after installing a driver on the computer, which gives us a good indication of what device exactly we will be uninstalling.
In the worst case, this error also happens when one of the already installed drivers is updated automatically online. If we do not know with certainty which driver caused the problem, the ideal is that you skip to the next step, which covers the solution of this problem with a more generic approach.
To uninstall the driver responsible for the error, we do it as follows:
- We go to the Windows icon (commonly located in the lower left corner of our Windows bar) and type “Device manager”.
- Windows will put our text as a search, which will automatically populate a list with the application or applications that best fit our phrase.
- Select the Device manager application from the list and run it with double click.
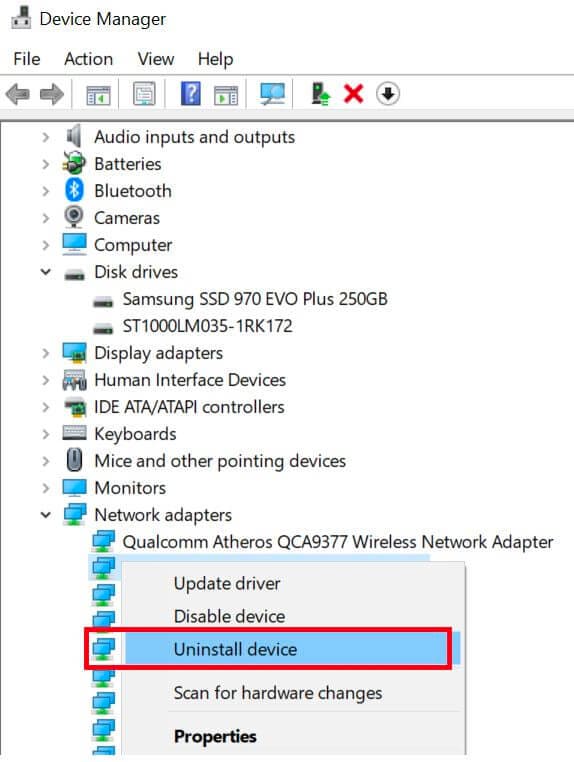
- A new window will be displayed with a list of the devices installed in the computer organized by type.
- By clicking on the arrow of the type of our device, we will see all the units within that specific line.
- We must identify the offending device and right-click on it. This will open a dialog box with a few options, from which we will select “Unistall device”.
Once the device is uninstalled, we restart the system and verify if the error persists. In the event that we encounter the error again, we will proceed with the following method.
Solution 2 – Update as many drivers we possibly can
It is very common that the peripherals that we buy for our computer come accompanied by CDs or links for the drivers installation. The truth is that many times, the versions of these drivers are not updated and therefore, we end up installing outdated versions that probably contain errors and do not work very well in our system.
For this reason, the most intuitive way to solve this type of situation is updating our drivers.
Here is how we can update our drivers:
- Click on the Windows icon at the bottom left of our start bar.
- Write “Device manager” and execute the application with a double click (just like the first 3 steps of solution number 1).
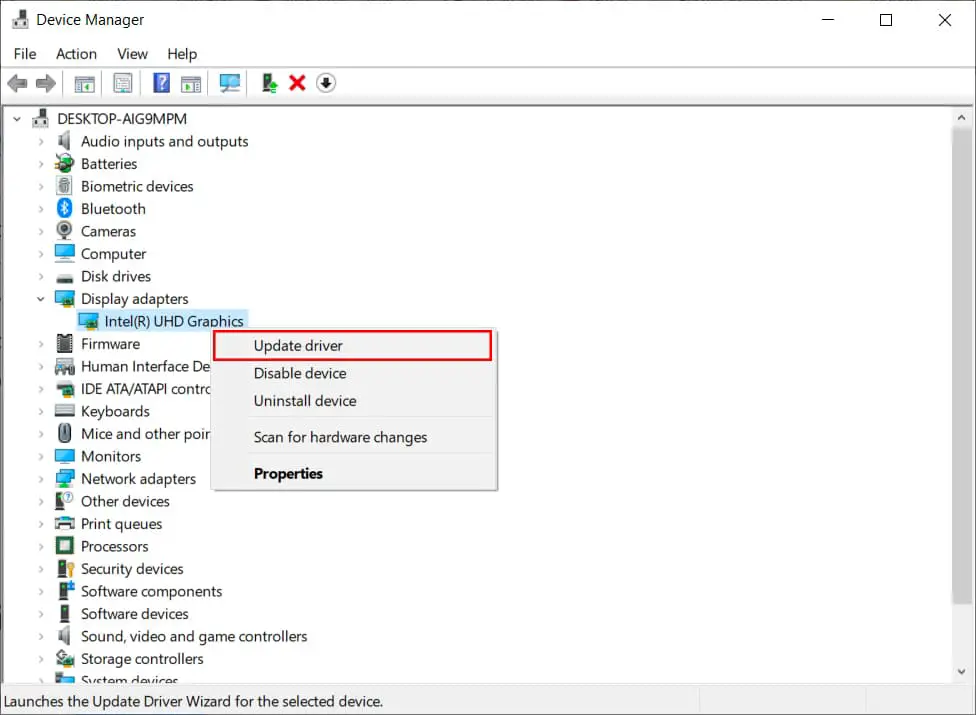
- We select from the list the driver that we want to update, by right-clicking on the device name.
- From the options on the dialog box, we choose “Update driver”.
- Then we select the first option in the next dialog box, which says “Search automatically for drivers”. In the event that you have manually downloaded the update from the manufacturer’s official website, you must select the “Locate driver” option.
- After the update has completed successfully, the computer must be restarted for the changes to take effect.
If after updating our drivers we see that the problem persists, there are other types of solutions that we can perform. Continue with solution number 3.
Solution 3 – Perform a memory check
The “the computer has rebooted from a bugcheck” error is also associated with temporary memory problems. This solution is very effective and extremely easy to perform.
How to perform a memory check:
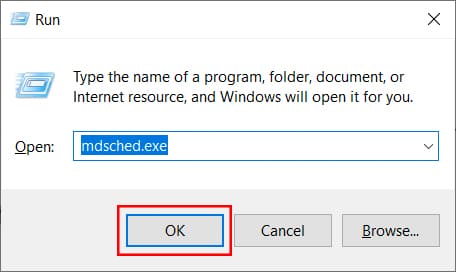
- Press Windows Key + R to open the “Run” panel and be able to run text commands.
- Type mdsched.exe in the input box and click ok.
- From the options that you will see below, select “Restart now and check for problems”.
This sequence of steps will be responsible for diagnosing problems related to the memory in your computer.
Solution 4 – Go back in time with a Restore point
Windows periodically performs return points to restore the system from a specific point in time in the case that we have problems with our computer and want to undo changes or unwanted events.
How to create a restore point in Windows 10:
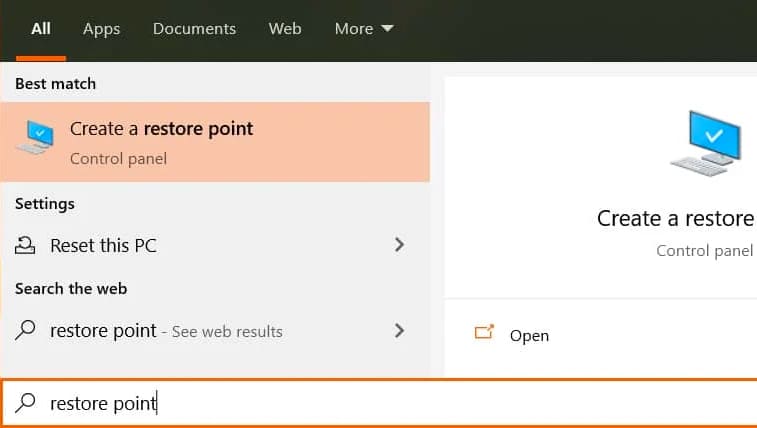
- Click on the Windows flag and type “restore point”.
- Double-click on the “Create a restore point” application.
- Click on the “Restore” button.
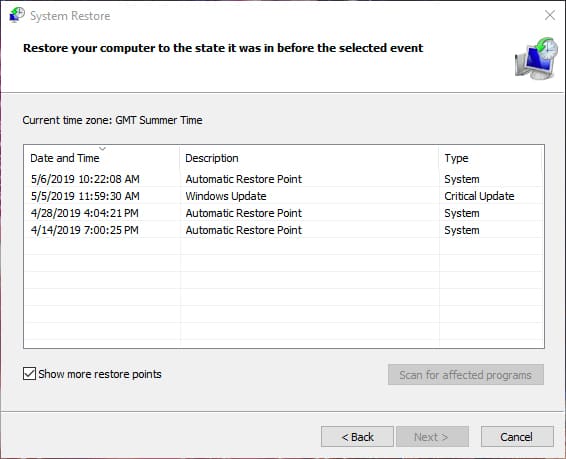
- Click on “Select a different restore point”.
- We must choose the restore point just before the appearance of the error in our system. Each option is defined by a date and time.
- Click on the “Next” option.
- We will see a warning message below. This option will reset our computer from a specific point in time. All actions or files carried out or created from that moment on will disappear from the computer (as if it never happened). That is why it is important that we know well what is at stake before choosing to carry out this process. In short, it is irreversible and could potentially delete important documents. Making a backup before is always a good idea.
- Click on “Finish”.
Solution 5 – Analyzing the memory dump log file to correct any issues
The types of computer problems that lead to blue screens are often difficult to diagnose and correct. This is because the cause of the error is extremely diverse and the error never specifies with certainty what factor is causing it. In this situation, the cause of the error can be diagnosed by analyzing the memory dump log file using the Windows Debugging Tools.
First, we must verify that there is a log file created with a report of what happened and a potential diagnostic tool.
How to verify if we have a Memory Dump Log file available:
- Click on the Windows icon.
- Go to “This PC”.
- In the options on the column to the left, select “Advance system settings”.
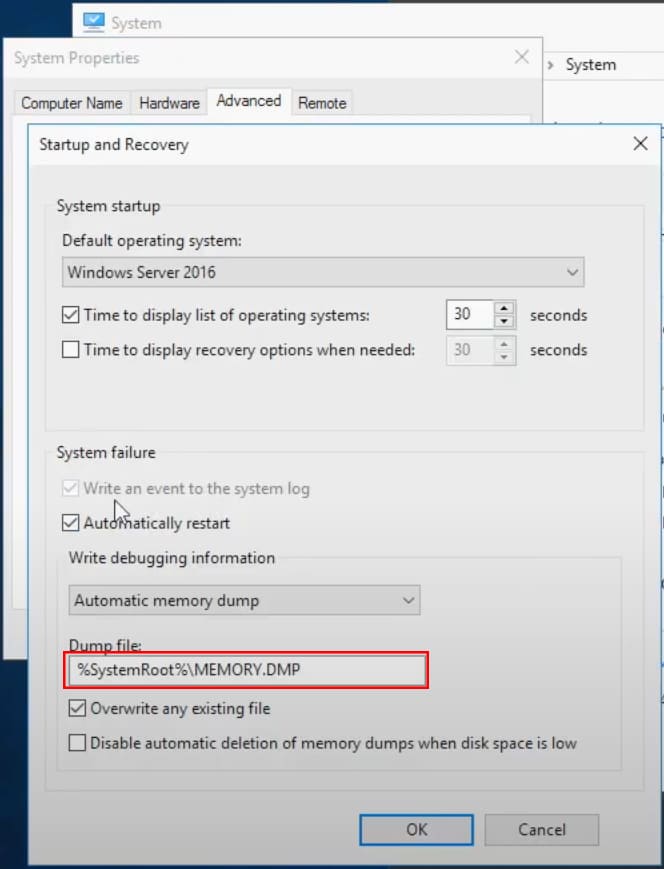
- In the “Advanced” tab, select in the “Startup and recovery” section, the Settings button.
- We must make sure that “Automatically restart” is selected in the System failure options.
- In the drop-down menu, we must choose the option “Automatic memory dump”.
- Lastly, we make sure to remember the name of the memory dump file (in the input box just below the drop-down).
By doing this, we already know that we have a file that we can use as a diagnostic tool.
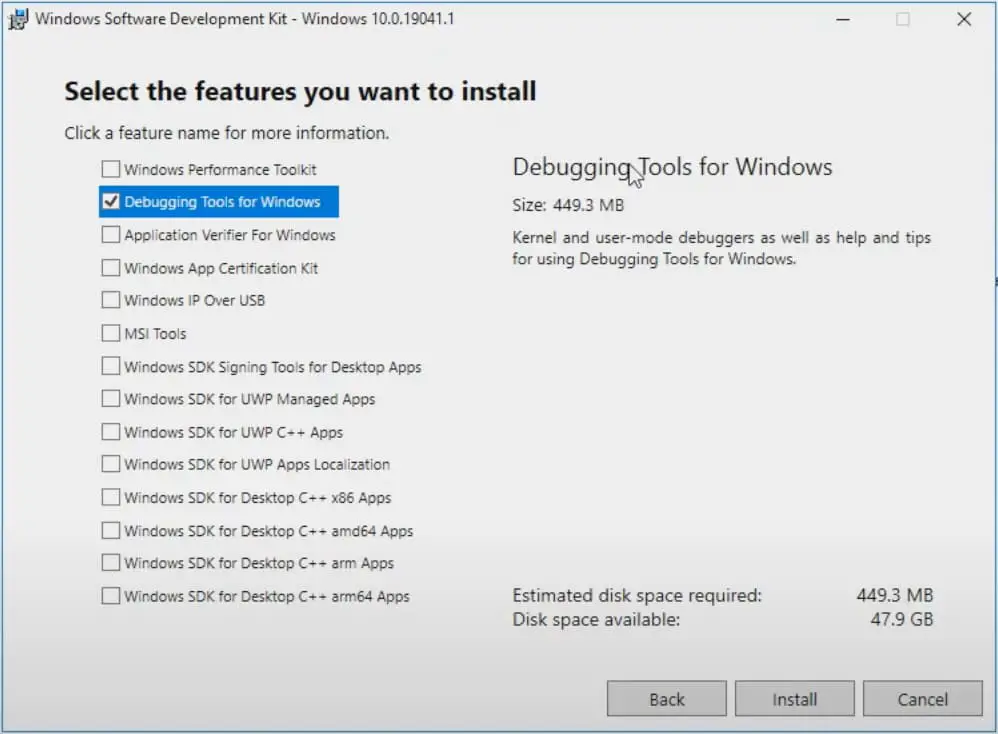
What we do next is open our trusted internet explorer and search for “Windows SDK”. This application is a software kit for Windows developers. Here we will not be developing anything, nor will we install the complete bundle. From this installation we will only need the Windows Debugging Tools, a lightweight dependency of common use.
We download the bundle and proceed with the installation. Of all the installation options, we are only going to choose “Debugging tools for Windows”. The application is called WinDbg, and after installation it will appear in the list of recent applications, at the top of the list when we click the Windows icon.
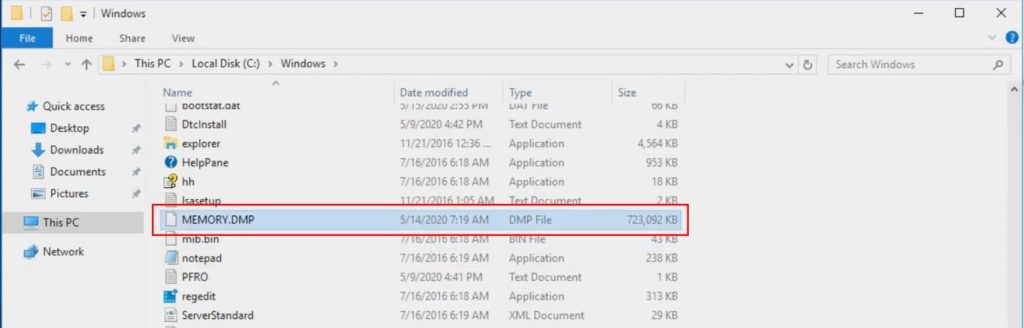
If we browse our C disk, in the Windows folder, we will see a file called “MEMORY.DMP”. We are going to copy and paste it on our desktop to have it on hand to carry out the next step.
How to perform a memory dump file diagnosis:
- Open the WinDbg application (64 or 32 bits, as the case may be).
- Select File > Open crash dump.
- We point to our desktop and select the file that we copied.
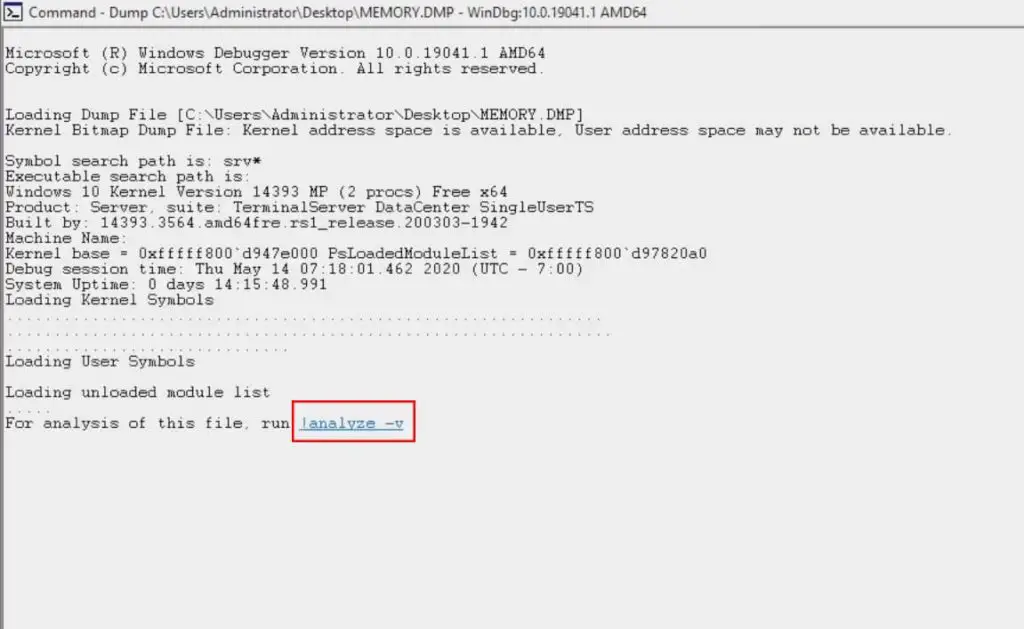
- We will see that the analysis will begin to run.
- Click the link “run analyze -v”. This step will provide more information about the events recorded in the dump file.
- In the report we will see a line that says “IMAGE NAME”. This is the name of the driver file that is potentially causing the error.
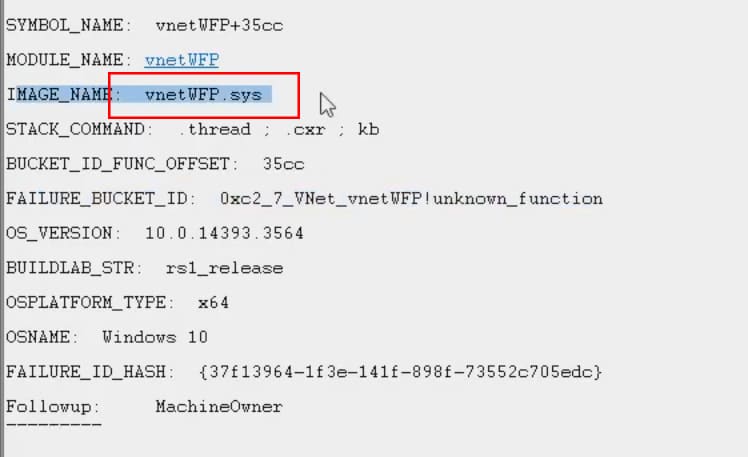
One way to find out exactly what device is using that driver, copy and paste the driver’s name into google and perform a search. This will tell you exactly what device the driver is using. Try updating or replacing the driver you have installed and later check if this eliminates the “the computer has rebooted from a bugcheck” error altogether.
More stories like this
- How to fix the Microsoft system error 8646
- Fix the “We couldn’t install some updates because the pc was turned off” error
- How to change the language in Windows 11
- How to configure parental control in Windows 11
- How to install DirectX in Windows 11
- How to install Windows 11 on VirtualBox step by step