You can also be interested in these:
- How to fix the computer has rebooted from a bugcheck error
- How to change the language in Windows 11
- How to fix the Microsoft system error 8646
- How to install DirectX in Windows 11
Windows 11 is ready to be used by people of all ages. If you want to configure a computer for a child, it is normal that you wonder how to use parental control in Windows 11. You should know that the way user profiles are managed for the small ones in your house is very similar to the one used in the previous versions of this operating system.
We will explain how parental control works in Windows 11. Additionally, we will tell you how to enable an account for a kid on a computer and what options are available to personalize the user experience according to the age of the minor. If you are interested in your children using the computer safely, then you will find a lot of value in this information.
How to create an account for a child in Windows 11
Before we begin, we need to make some clarifications. The first one is that most of the parental control functions in Windows 11 are managed from the browser. Why? Because user account for kids must be linked to an online Microsoft account, which additionally, must be included within a family group. Therefore, we have another implication to this as the second point we need to disclaim: For parental control to work properly, the main Windows 11 account must be linked to an active Microsoft profile.
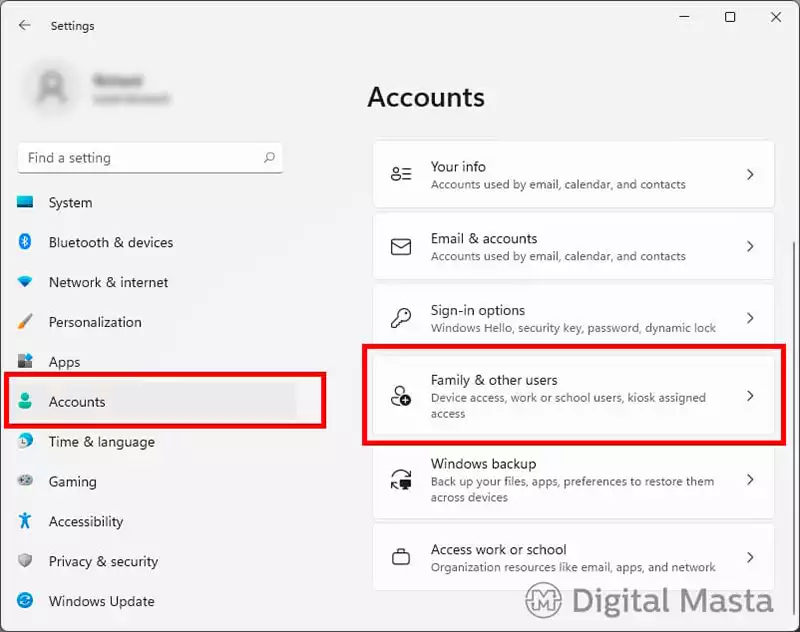
Having said this, it is time to give the kiddo access to the computer. To start, it is essential to create a user account. Go to Windows settings, open the accounts section and click on “Family and other users”.
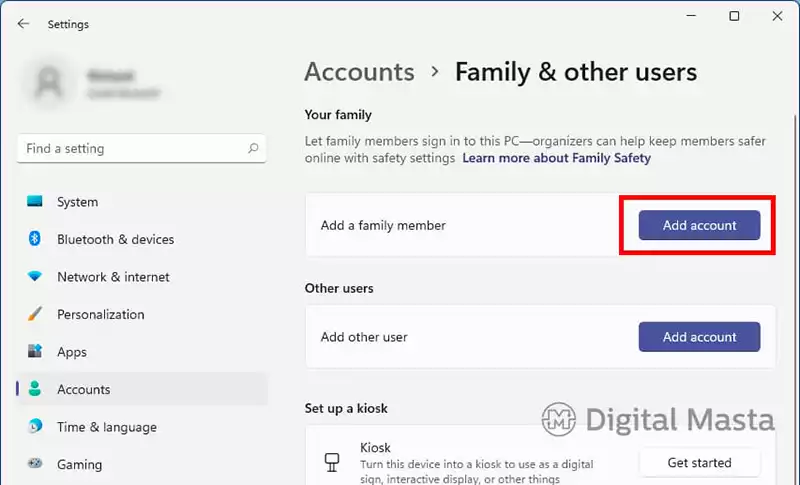
On the next screen, use the “Add account” button that you will see in the “Add a family member” section. It is important that you use this one and not the one below it that says “Add other user”. They are meant for different purposes.
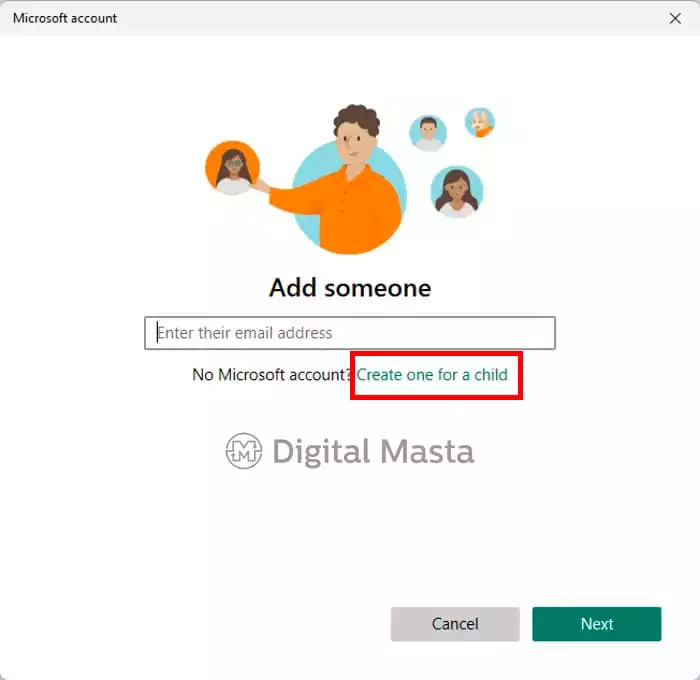
You will immediately see a pop-up window with a wizard walkthrough, where you must click on the “Create one for a child” link. Proceed with caution here, if the child already has an active Microsoft account, just use the upper text field to log in. You should only use the link if you don’t have an enabled profile yet.
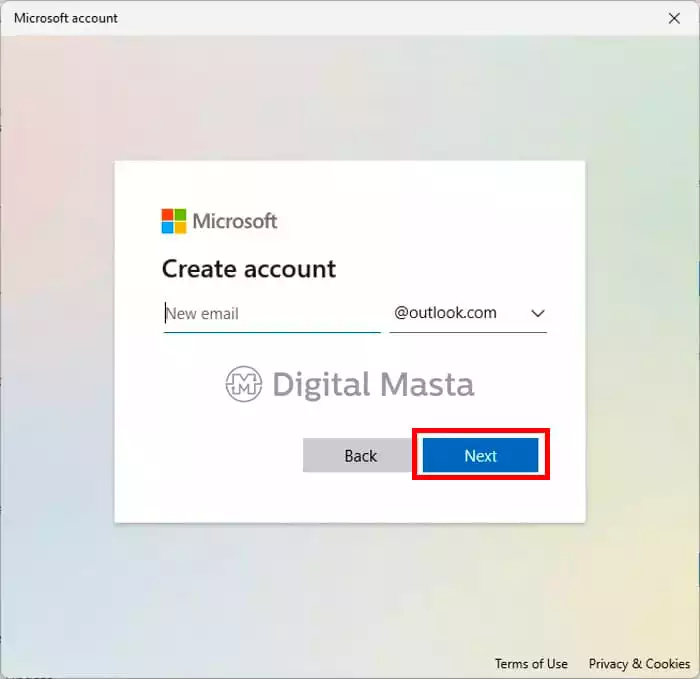
Next, create a new email address using your preferred domain. Then click on “Next” to proceed.

Create a password for the family member. Again, use “Next” to jump to the next step.
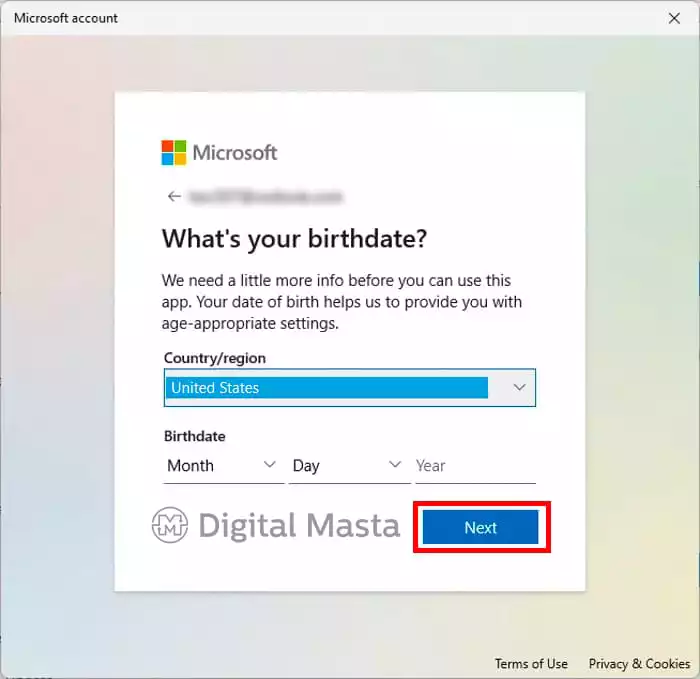
Now, add additional information, such as the region or the day of birth. Confirm with the “Next” button.
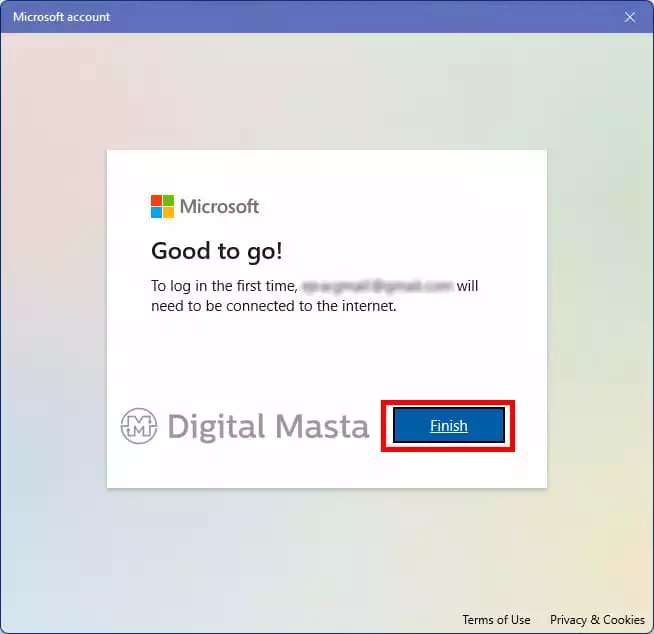
When you are done, the child will have his/her own account on which he/she will be able to log in to Windows. Automatically, it will be added to the Microsoft family group. In fact, as a confirmation to this, you will receive a notification.
At this point, the new user linked to an account for kids you just created have been added. Now, It is the time to manage parental controls in Windows 11.
How to manage parental controls in Windows 11
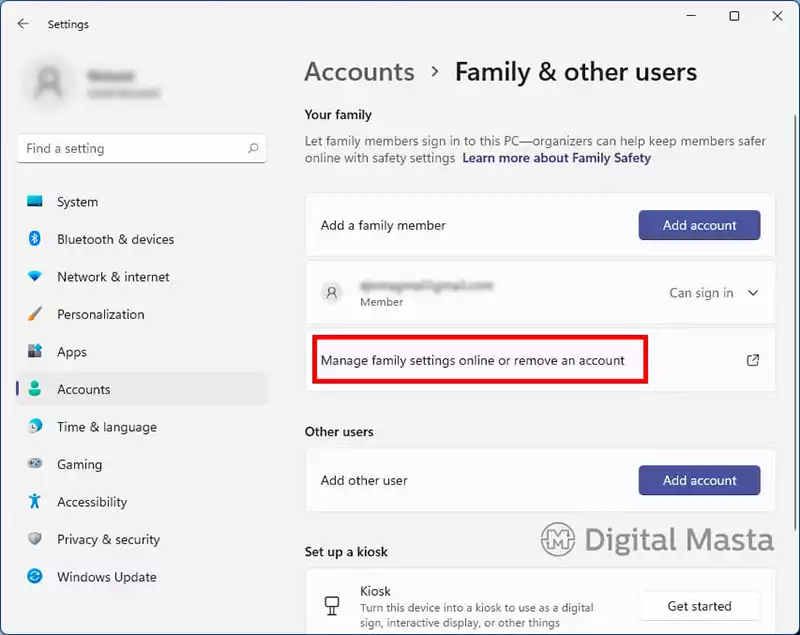
If you go back to Family and other users section you will find in the “Configuration” dialog box. You will see that the minor already has a user profile created in the system. Below it, there is a link to manage parental controls online or remove an account. Click on “Manage” to see all the available options.
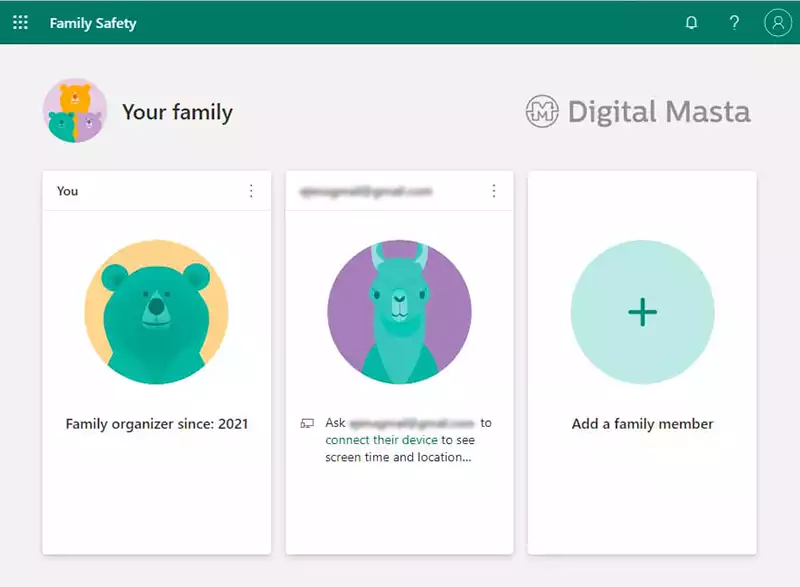
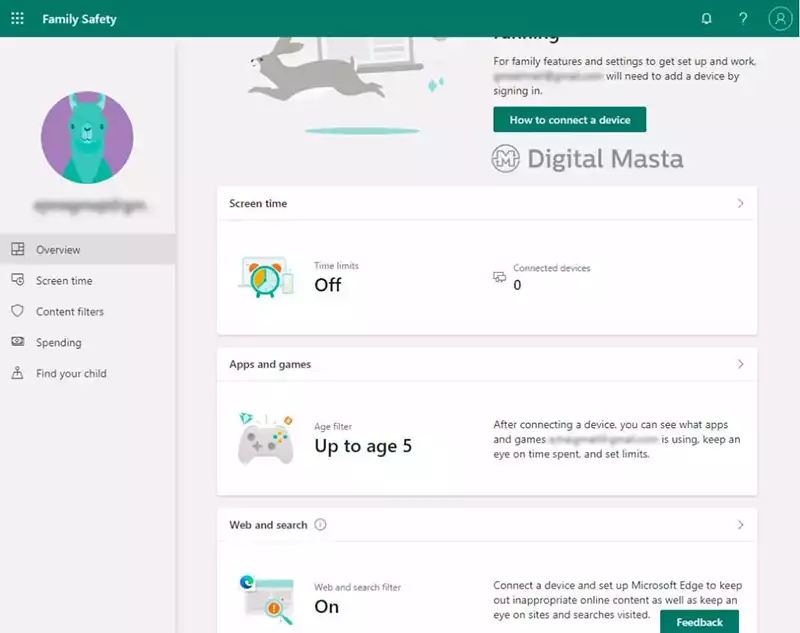
By using the side navigation menu, move through the different aspects that you can control in the minor’s account. For example, it is possible to determine how long a device can be used. You can also activate the web filter to prevent access to inappropriate sites. You can even specify the recommended age of applications and games used in Windows 11.
On this same page, a little further down, you will see that you can add balance to the account to make purchases in the Microsoft store. It also includes a shortcut to the Xbox settings, which is also managed from here.
In the “Screen time” section, you will see that it is possible to limit the hours of use of Xbox and Windows computers. Use the Activate limits buttons to customize this section. Remember that for the changes to be effective, it is necessary to log in with the account for the child that you created in the previous step, both on Xbox and on the rest of the computers.
Now look at the “Content filters” section, these options prevent children from accessing inappropriate sites and filters searches to avoid undesirable content to show. It is important that you keep in mind that this configuration will only take place if the kid is using Microsoft Edge. If you like to extend the range of these filtering rules to other internet browser applications, you can do so in the same “Content filters” area.
Up to here, these are all the online Family Safety options. All of them are part of parental controls in Windows 11 and Xbox. Each of the modifications that are made following the steps mentioned here will be extended to all the devices in which the minor has logged in using the same account.
Other parental control options in Windows 11
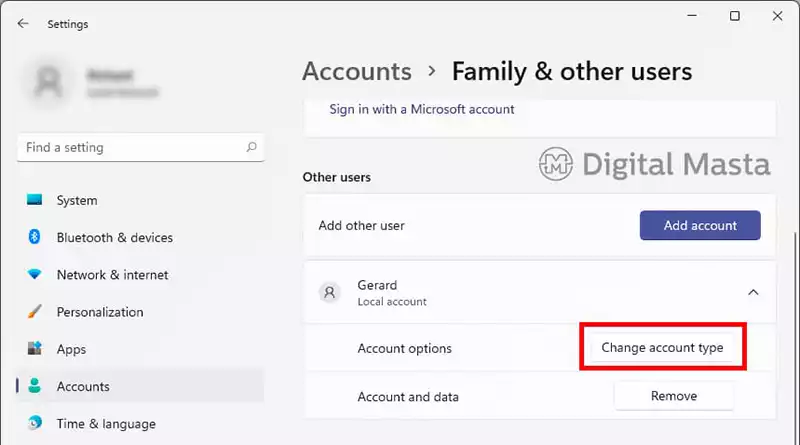
Besides most of the parental control options that are found in the Family Safety section of the Microsoft account, there are also a few others you can activate from the Windows 11 configuration panel. For example, it is possible to block the login of the child using the Block login button that you will see next to the link “This user is configured to login”. Similarly, you can also change the kid’s account type at any time, allowing him to be a computer administrator (when they have grown, of course). In this case, press the “Change account type” button.
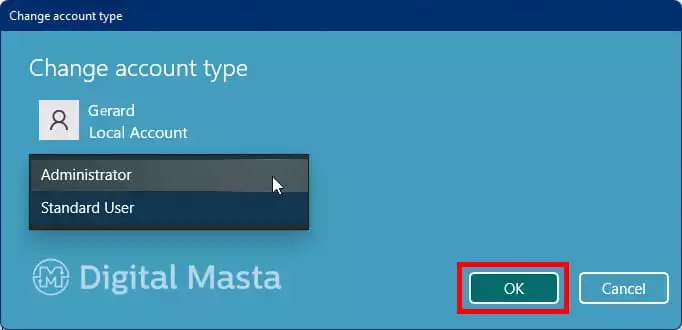
In the pop-up window, select the type of account you want for them.
This setting can be valuable if you want your son or daughter to access certain computer resources and make modifications on their own. Of course, we recommend that you don’t change the account type to Administrator if your child does not have the proper knowledge. Finally, we remind you that this setting is modified individually on each computer, so you can keep the child as an administrator in a computer, but as a standard user in one that you might want to limit their access.
Why is it important to know about Windows 11 parental controls?
Knowing all the possibilities offered by parental control in Windows 11 will allow you to protect the little ones in the house from inappropriate content for their age. In the same way, it is useful to control the time they spend in front of the computer screen or playing with the console. The use of technology is very important for your child’s development. The reality is, even for adults, the internet is not a safe place. Parental access options will give us that extra safety net and peace of mind knowing that our children are somewhat protected from the bad aspects of this medium.
More stories like this
- How to fix the computer has rebooted from a bugcheck error
- How to change the language in Windows 11
- How to fix the Microsoft system error 8646
- How to install DirectX in Windows 11
- How to install Windows 11 on VirtualBox step by step
- How to move the location of the Windows 11 Dock
Thanks! Very helpful!
Family Safety Question: If your child has a local account in Windows 11, does internal parental controls work or not? If not, should I use other parental controls like Time Boss, Net Nanny or others?
Hello Michelle, we are glad we helped.
Regarding your question, the local user for this purpose should be left for administrative use, in this case for the parent. The parent account should be also linked to a Microsoft profile. The kiddo will be able to log in the computer after creating the child’s Microsoft profile, but it will be linked to the main parent profile on the computer. To be honest, we are not familiar with the software you suggested, but it all boils down to what you find is best for you to manage your kid’s profiles. The advantage to have the parental control options from Microsoft is the integration with Xbox.