You can also be interested in these:
- ASUS ProArt Z790-CREATOR WIFI motherboard review
- Z790 AORUS Tachyon full review
- What is Secure Boot and what is it for?
- ASRock B365M IB-R (Pro4) motherboard review
We are all aware that computers have always been assembled using screws. Each computer case always comes with a bag containing the screws that we will need for the assembly. However, it is not that the box manufacturers are lavish too much in the amount of screws that they give with the box. What types of motherboard screws and mounting hardware can we find in PC?
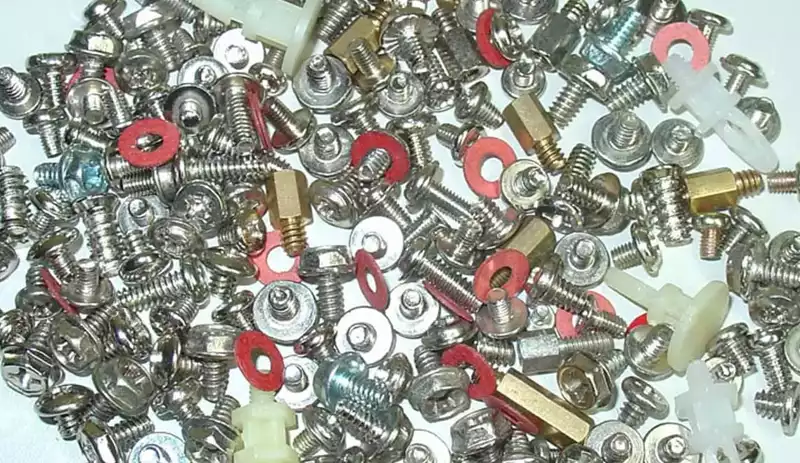
Up to 8 different types of screws we may need to assemble and maintain our computers. Some of them are quite common and usually come with quite a few with each box. Others may be more exotic and may be somewhat complex to locate in a store, should you need them. And, sometimes, we will need more screws, in the case of wanting to install new components inside our box. In this guide we are going to see the different types of motherboard screws and mounting hardware that a computer needs (to a greater or lesser extent, and of course you may not need all of them in any case).
Motherboard screws and component fasteners
M5x10
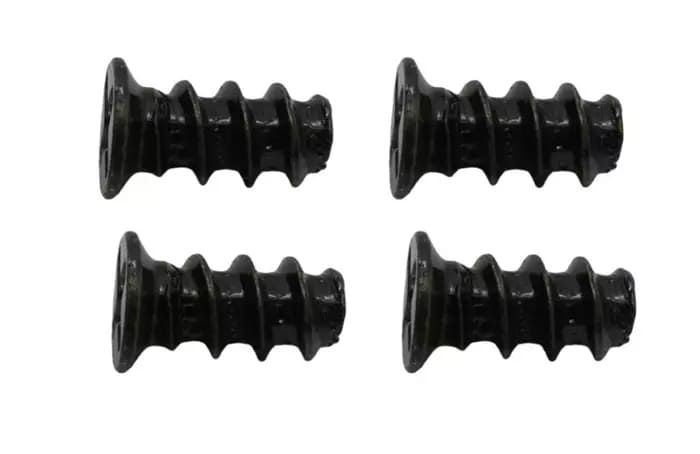
This screw is the one used to hold the fans to the case of our computer. Its head is flat, with a conical shape to enter the flare and is usually of the Philips No. 2 (star) type. The diameter of the thread is 5.5 mm and its length, excluding the head, is 10 mm.
As a rule, computer case manufacturers usually include up to 4 of these screws. Although they are usually supplied with the fans when we buy them.
6-32
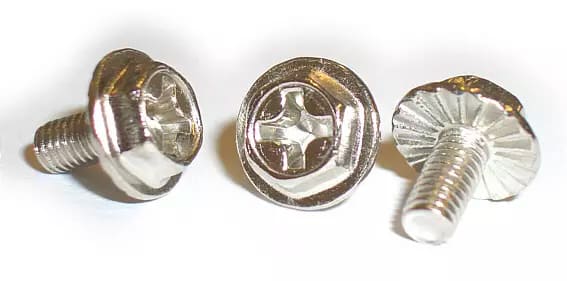
This is the most common large screw on our PC. It is usually used to hold the expansion cards that we put to the motherboard, as well as the power supply and even the side panels of the case. The thread pitch is 1/32 ”, the diameter of the thread is 3.5 mm and its head is usually hexagonal. The standard stem length for it is usually 6.35mm or 1/4 ”.
This type of screw requires a Philips # 2 screwdriver.
Thumbscrews
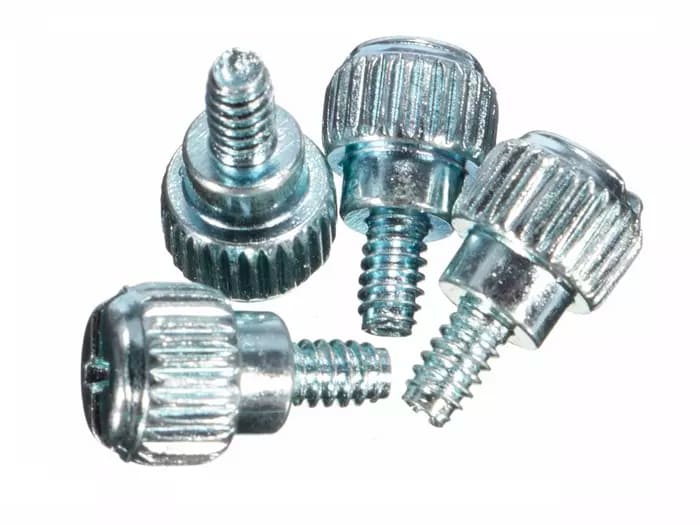
Thumbscrews are a type of screw that has a fairly large head, which has been knurled. This allows them to be loosened and tightened using only the fingers of the hand (although they generally also have grips to use screwdrivers). Thumbscrews typically have a shank about 7.5mm in length and are typically used to hold the side panels of the case.
This type of screw requires a Philips # 2 screwdriver.
M3 hexagonal head
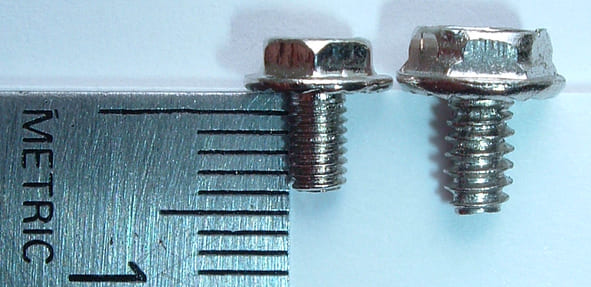
This type of screw has a thread pitch of 0.5 mm and a diameter of 3 mm. The length of the stem is 7/32 ″ or 5.55 mm, having, as its name suggests, the hexagonal head. They are often used to hold optical drives. Its external appearance is very similar to that of the previous 6-32 screws, which usually leads to many mistakes during assembly. The most important difference between these 2 screws is the thread pitch: M3 hex heads have a finer thread compared with the 6-32 screws.
This screw model requires a # 1 Philips screwdriver.
M3 round head and long shaft
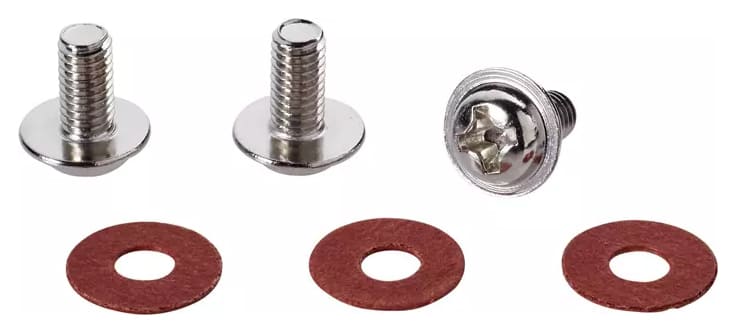
This is the screw that is typically used to secure the motherboard to the brass standoffs. It is also used to attach 2.5-inch SSDs to their brackets / bays.
This screw model requires a # 1 Philips screwdriver.
M3 round head and short shaft
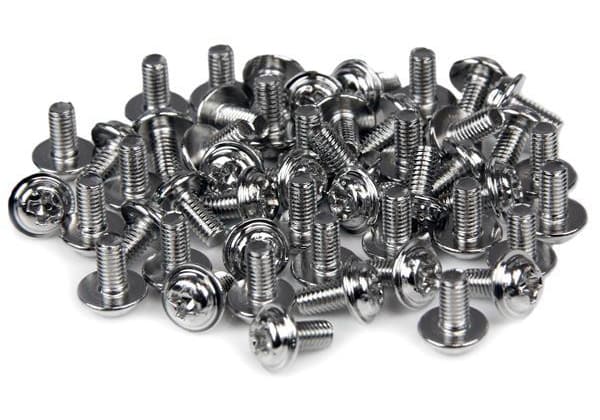
It is identical to the previous model, only the stem is only 4mm in length. It is often used to attach optical drives to the case.
This screw model requires a # 1 Philips screwdriver.
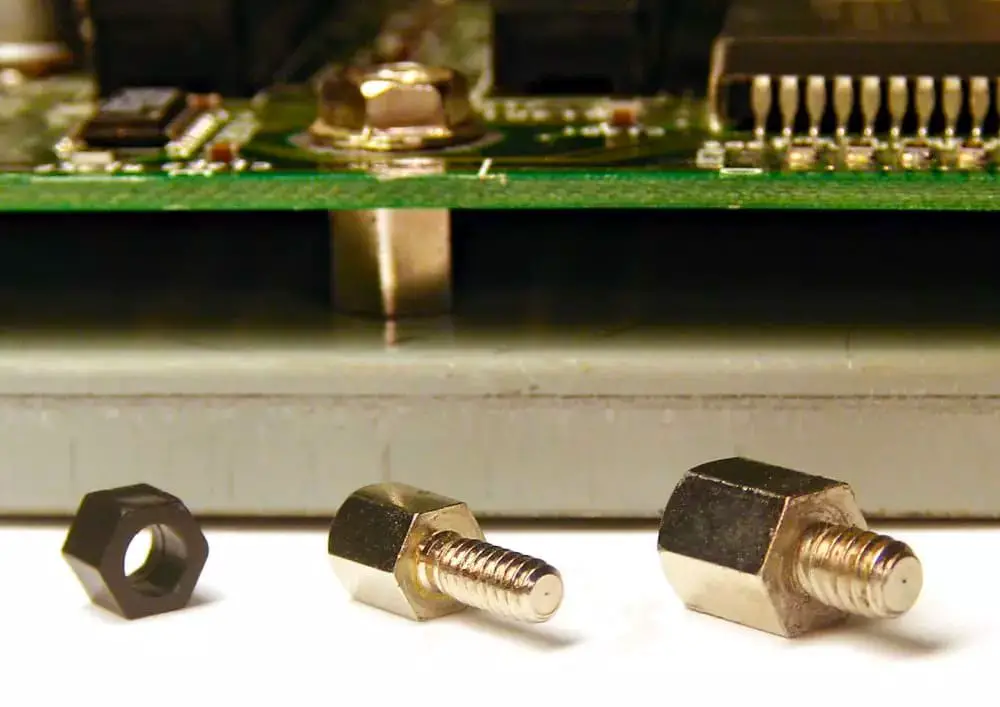
M3 metal standoff – Fine thread
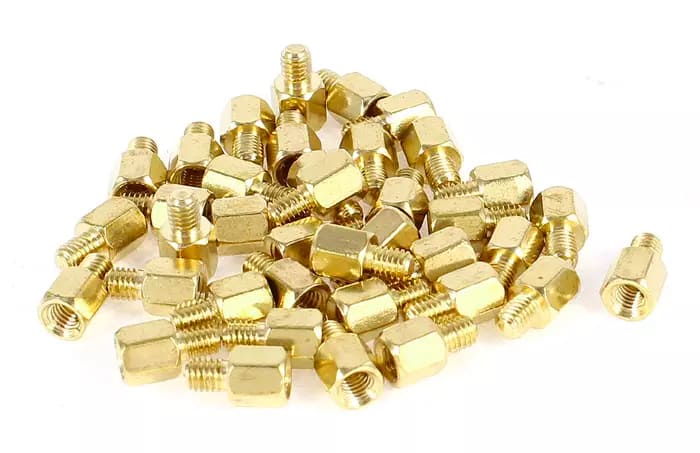
This is the brass standoff used to mount the motherboard on the mounting tray inside the case (or on a test bench). This type of separator has a male and a female thread (inside), with a pitch of 0.5 mm. The length of the shank is 3mm, while that of the internal bore is also 3mm.
To screw these spacers it is necessary to have a 3/16 type hexagonal socket wrench.
M3 metal standoff – Coarse thread
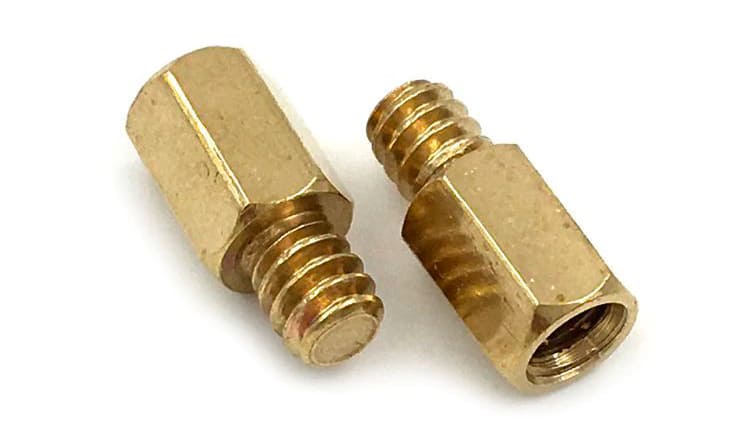
This spacer is identical to the one we have just seen, except that the thread pitch of the stem is 1/32. The thread pitch of the internal hole is still maintained at 5 mm.
How to properly install the motherboard screws in the computer case
If you are thinking of buying a new PC by parts and assembling it yourself, you should know that one of the most delicate elements when it comes to installation is the motherboard. You need to be cautious when mounting the motherboard to do it properly and without damaging anything in the process.
Of course, it is understood that you already have the motherboard and the computer case ready for installation, as well as the necessary motherboard screws (which is always included with any case). Installing the motherboard may seem like a breeze, like putting it on, screwing it and ready, but it has its technique.
Installing the motherboard in a case shouldn’t take more than a couple of minutes. If you are about to do it for the first time or think you might run into problems when performing the operation, for whatever reason, do not despair, it is a simple process and doesn’t require any special knowledge.
1 – Prepare the case with the standoffs
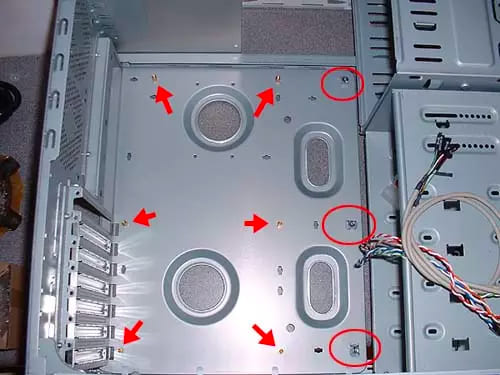
Almost all computer cases, when you buy them, already have the brass brackets pre-installed that will raise the base plate a little so that it does not make contact with the box metal plate and, at the same time, acting as anchor points for the screws. The first step is to place the box horizontally and check that all the supports are correctly positioned according to the motherboard layout we are going to install.
2 – Install the I/O shield
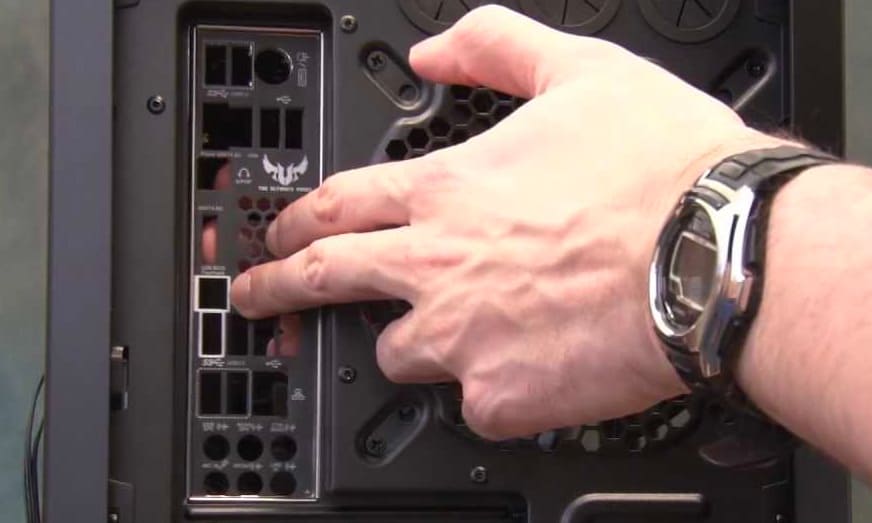
More than once, even the most expert, we forget this step: install the rear trim that not only serves to make the part of the motherboard ports more presentable, but also covers holes through which dirt could enter. To install it, simply make sure it is in the correct orientation and push it in with your fingers (it snaps in), making sure it is even and secure.
It is very important to do this now, because if we install the motherboard screws and it’s fixed in place, this element cannot be put from outside and we will have to disassemble the board again to be able to put it on.
3 – Fix the motherboard on its location
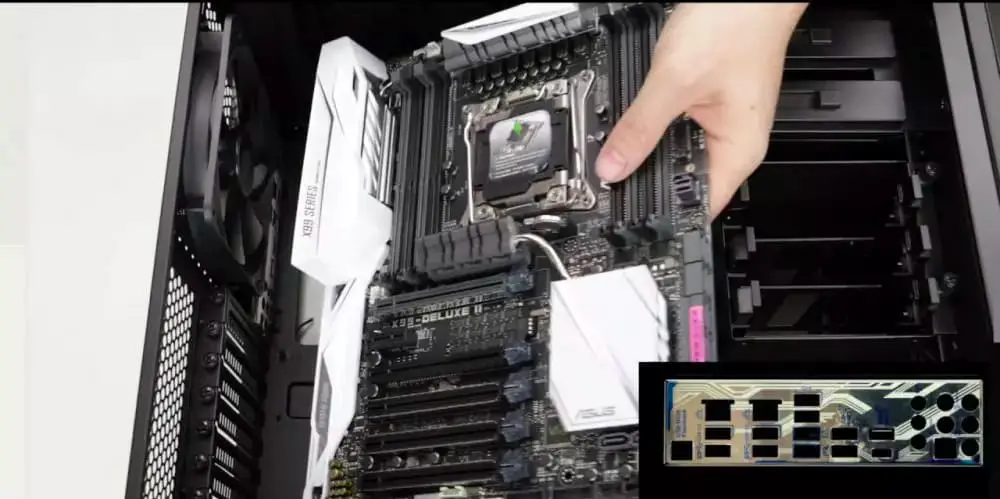
A step prior to this point, and highly recommended, is to have previously installed the processor and, in some cases, even the heatsink.
Now, the time has come to mount the motherboard. To do this, hold it carefully with one hand on the right side, and insert it diagonally making the rear ports coincide with the trim. Once they match, carefully lower it until the holes in the plate are over the brackets. Generally, these brackets have a protrusion that will allow the plate to remain firm even without screwing (as long as it is horizontal), even if we have to press against the bezel to match the holes.
4 – Fasten the motherboard screws
Lastly screw the motherboard in place. Since the holes already match the brass brackets, the process is as simple as inserting the motherboard screws and tightening them. Locate the holes so you don’t miss any.
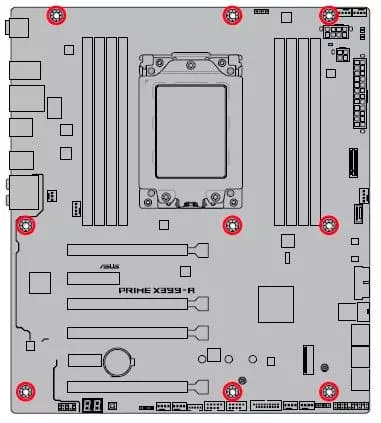
Be careful not to over-tighten the screws so as not to damage the motherboard. Whenever you notice that it is becoming difficult to tighten, stop using applying torque not to force it. And rest assured, the plate will be well supported since it has multiple attachment points. For example, the normal thing in an ATX board is that we have to put a total of nine screws.
Ready, once we have tightened the screws we will have the motherboard correctly installed and we can proceed to connect all the cables and install the rest of the hardware of the new PC.
How to remove a screw without a notch or damaged
It will be more than once that we will encounter the problem of having a screw in our pc we cannot remove. Unfortunately, it is more common than it seems, and we have a couple of methods to solve it.
There are no miraculous results, a stuck screw, for whatever reason, only has two solutions in a PC chassis: either it ends up coming out or we will have lost that thread forever. In many cases the screws are made of plastic, generally ABS, so destroying them becomes be very easy. The harder task is when a metal screw decides to rise against you.
1 – Use the right tool
It seems the most obvious thing in the world, but nothing could be further from the truth: most users have at most 3 screwdrivers for all types of screws. The problem is that depending on which screws the head of the same has nothing to do with what we need, neither in dimensions nor in depth. The first recommendation is to acquire once and for all a specific screwdriver kit, type iFixit with one of its kits.
If we do not want to spend money, ideally we do not use a star head for a star screw if it is too big for the screw head. Otherwise, it is better to use one with a smaller blade and using small blows to try to force the rotation of the screw. It will take time and the blows should be dry, not very strong and accurate, but it usually works if we have patience.
2 – The rubber band trick
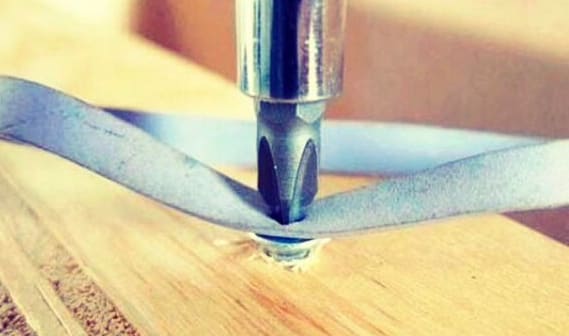
Another solution would be to use an elastic band, since being made of a very flexible material if we insert it into the screw head and then use a screwdriver, the rubber will enter the slits and allow us to have more traction when it is not the perfect metric for the screw in question.
There is no more science, but you will have to be patient and use several pieces of the rubber to remove the screw as such.
3 – Olive oil
Another of the most basic tricks and assuming that we do not have a professional mineral oil at hand is to simply use a couple of drops of olive oil at the base of the screw to soak it inside its thread and make it move better when we try. remove it with the screwdriver. If you use this method, try not to get any oil on the screw head.
4 – Wd-40
There is not much to say further than it is already known about well-tested products like WD40 or similar. The trick here is to place the screw perpendicular to the floor or table, that is, at 90 degrees from the horizontal, apply the oil in its right amount and being very accurate. Above all, leave the product to act for a few hours so that it penetrates the holes.
It is more than likely that if we have the specific screwdriver, this method will be very useful, because we will remove the screw effortlessly.
5 – Cold effect loosening oils
It seems like a no-brainer, but the truth is that even in nylon screws, be it the plastic thread or another material, combining a multipurpose oil with a cold-effect loosening oil plus a suitable screwdriver, is the perfect marriage to get that motherboard screw once and for all.
This type of oil comes out at a very cold temperature and you have to be careful where it is applied so as not to damage other components, you have to be precise in its application, but they are tremendously useful, especially if either of the two materials is metallic. In addition, they are usually cheap and one bottle is generous for several applications.
6 – Pressure or impact screwdriver
It is a very curious screwdriver, since we have to hit it at the opposite end of the tip and with it and through its system it multiplies the effect and force of the blow, transforming it into turning force.
That is, the stronger we hit it, the more turning force it makes. Logically we must have the exact head at the head of the screw to exert the greatest possible force, and also, we have to be very precise with the blow so that the screwdriver does not move.
The second problem is that this is not useful if the screw is not metallic, since with such force exerted we can easily pass the screw head in plastic applications.
7 – Applying heat
It is a very aggressive method and above all very risky, since it involves heating the screw and the thread with a focalized nozzle heat gun so that they expand a little. A powerful heat gun is not necessary, it can even be hand-held, since we barely have to get between 60 and 70 degrees in both components.
The problem is that, logically, they need both to be metallic, because in turn we will be bonding the two materials because they will melt to a greater extent.
8 – Using screw extractors
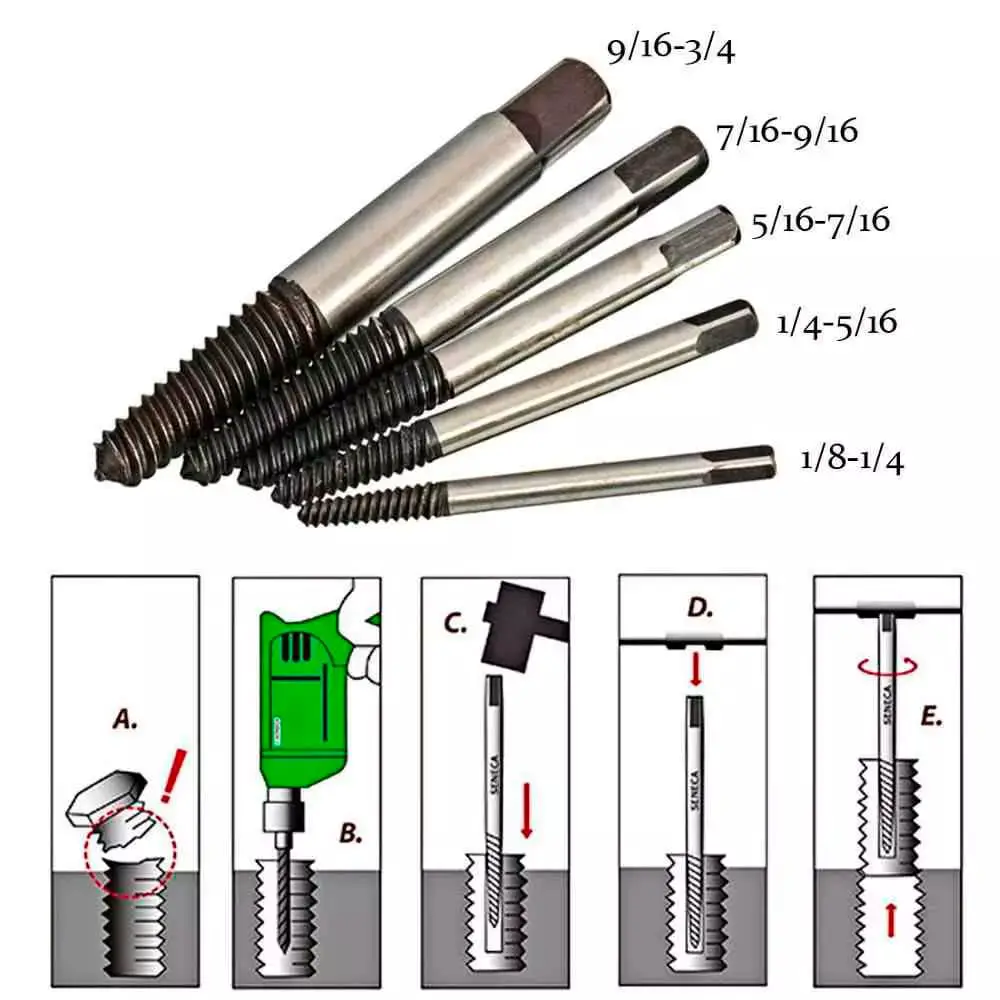
It is the last possible solution, since it involves a bit with its corresponding Dremel or drill. It involves taking a metal drill bit (if the screw is plastic) or a high-speed steel (if the screw is metal) with a smaller diameter than the screw and drilling it vertically to the end of it.
Then and once the hole is made, a screw extractor must be installed, which must be very specific given the size of the hole, we will put it in the center of the screw and with a spanner or any tool that we can turn the extractor to insert it into the screw.
Sometimes it is not necessary to drill the entire screw, but simply a small hole, but to extract it by turning it, we will have to be very careful.
More stories like this
- ASUS ProArt Z790-CREATOR WIFI motherboard review
- Z790 AORUS Tachyon full review
- What is Secure Boot and what is it for?
- ASRock B365M IB-R (Pro4) motherboard review
- Your motherboard doesn’t recognize the M.2 SSD? Fix it here
- Intel B660 vs Z690, which is worth your investment?