You can also be interested in these:
- How to remove thermal paste on CPU pins?
- Is it ok to put cheap thermal paste on your CPU?
- How to set CPU priority to prefer foreground Apps in Windows 8.1
- What is Dark Silicon and what is it currently used for?
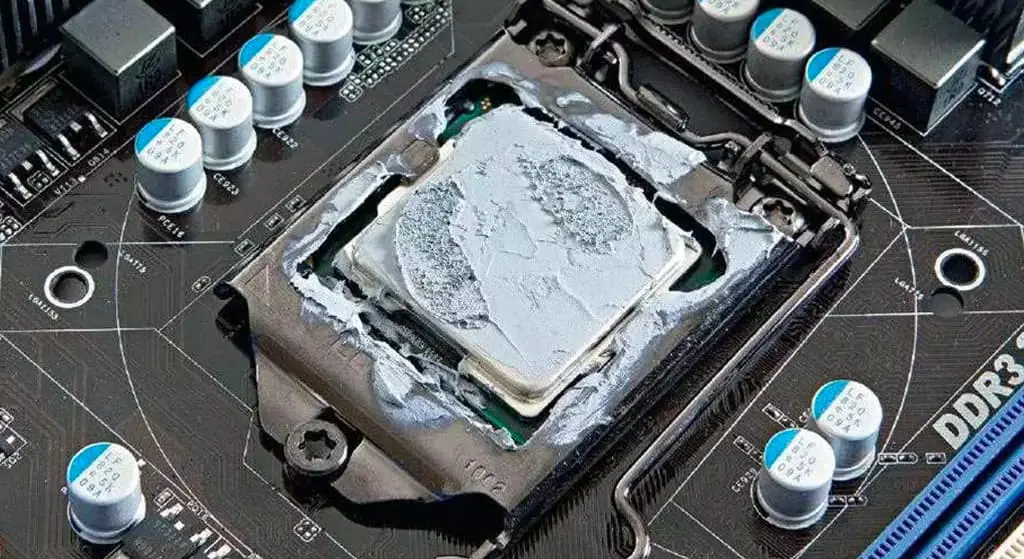
Thermal paste is an essential element in the PC cooling process; It is placed between the IHS of the processor and the base of the heatsink to guarantee that the heat transfer between one surfaces occurs correctly, since there are small protrusions that, if thermal paste were not used, would cause serious temperature problems. This is a determining factor in extending the life and development of the CPU and how long does thermal paste last.
Applying thermal paste (also called thermal putty or thermal compound) is a process that we must do every time we remove the heatsink, either from the processor or from the graphics card. With this process we ensure that the contact between the IHS and the heatsink does not contain air that prevents the transmission of heat between surfaces.
Thermal paste is a dense product composed of different materials designed to eliminate the gaps between the IHS of the electronic component and the base of the heatsink. Its main qualities are that it is conductive to heat but not conductive to electricity, to avoid possible short circuits in the equipment. They are generally found to be composed of diamond dust, silver, aluminum nitrite, boron nitrite, or zinc oxide. They tend to have a viscosity that varies depending on the brand, ranging from very dense, which are the hardest to apply, to very liquid.
In the hardware world there is a wide debate about the correct way to apply thermal paste. Each method certainly has its peculiarities, but in reality, all that matters is you do it correctly. All of them will give you the performance you need, so it is not that one method is the absolute winner.
What is the function of thermal paste?
The function is to cover any imperfections on the surface of the processor or graphics card IHS. These imperfections create air pockets when the heatsink is placed on top of them and, as we all know, these air pockets act as heat insulators, preventing heat from passing to the heatsink as it should. And while these blemishes can be removed by polishing the IHS, it seems like too much work for most mortals who just want their computer to work.
Thermal paste is responsible for eliminating these air pockets with a material that is capable of transmitting heat between both surfaces without opposing much thermal resistance. In general, the better the thermal paste, the better temperatures you can get.
How long does thermal paste last?
In every computer there comes a time when, despite having all the components neatly clean, the internal operating temperatures remain high. This is the moment when you should consider changing the original thermal paste that you have applied a long time ago, replacing it with a new layer that allows the temperatures to return to normal depending on the optimal performance level.
As we mentioned before, for heat transmission to occur between two metal surfaces, the contact area of both surfaces must be as flat as possible and free of imperfections in their machining and finishing. As this is very complicated to do, the thermal paste that is responsible for creating a means of transporting the heat between the two surfaces, eliminating possible gaps that remain between the two.
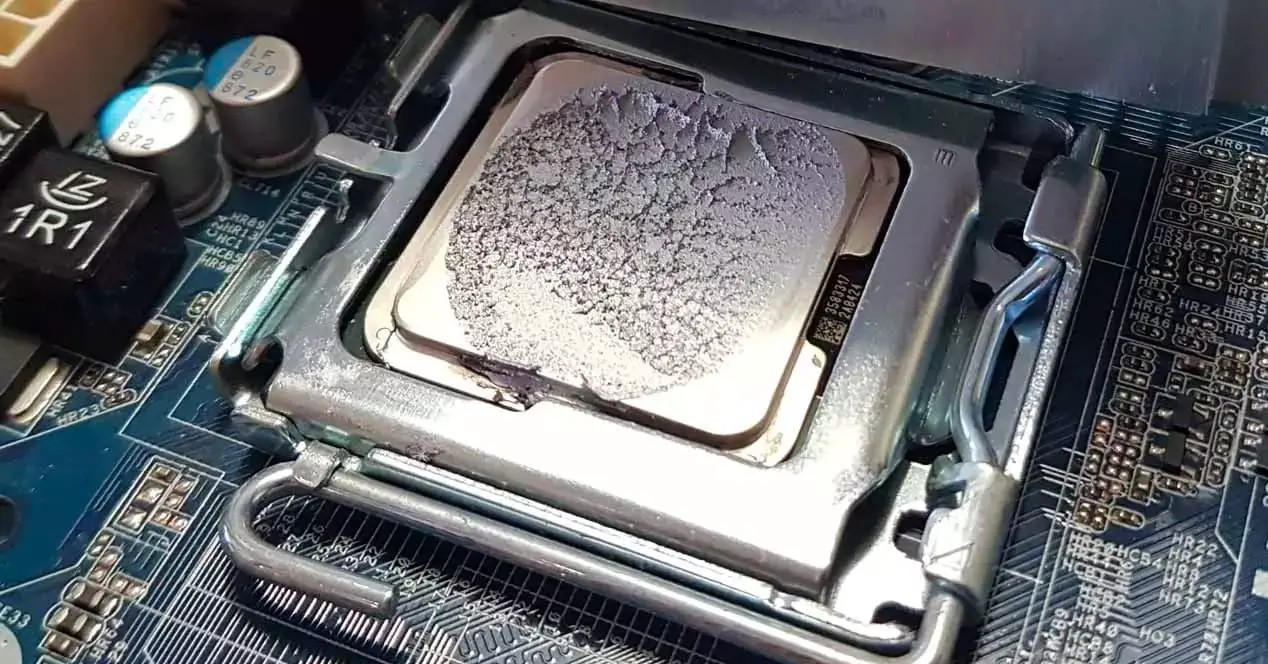
But, with the passage of time, the thermal paste dries up and begins to lose the thermal transmission properties that had led us to apply it in the first place. The question is how to know when this is happening and, in general, how long does thermal paste last, to avoid having problems with high temperatures inside the computer.
You will begin to see the first indication that your thermal paste has dried due to a large increase in temperatures in certain components. Assuming that the heatsinks of that component are clean, it is almost a sure bet that the increase in temperatures is due to the fact that your thermal paste has dried up and has stopped working. It is time to change it as soon as possible.
As for when to do it, before reaching that extreme, the reality is that it depends to a great extent on each thermal paste brand since some last longer than others. For example, the Noctua NT-H1 is quite famous, not only for being one of the best thermal pastes on the market, but also because its operational life before having to change it is 6 years. At the opposite extreme, Actic Silver 5 paste has a maximum longevity of 6 months before it starts to degrade. Another example is the Arctic MX4, which usually lasts almost 5 years before drying out.
The question here is not how long does thermal paste last, rather it should be how often should I be replacing it to be on the safe side. We would advise to change the thermal paste every year and thus, that way, you keep enough clearance to prevent temperature problems.
Applying the thermal paste
The first thing to do is clean the surface of the IHS with isopropyl alcohol or rubbing alcohol. You can also use products such as Artic Clean that serves to remove the old thermal paste and prepare the surface for the new paste. I have used it for a long time with very good results, but alcohol seems to me to be a much cheaper method and just as effective.
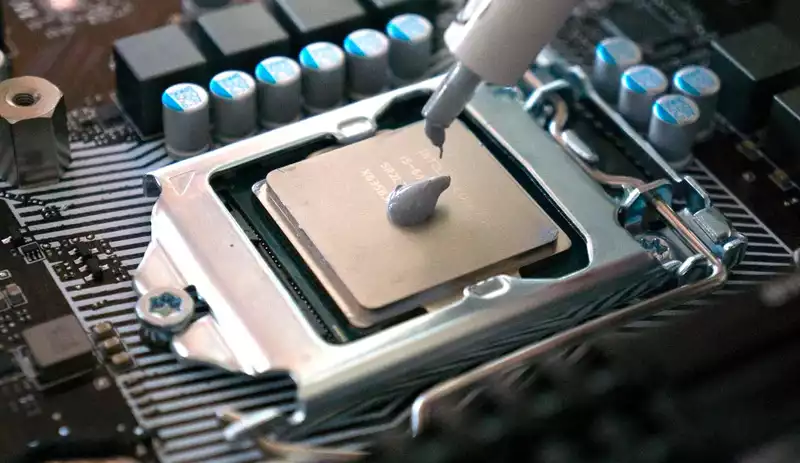
The next thing is to apply the paste. You should always apply just a little bit to the center of the IHS before starting the heatsink mounting. Done this, the paste is spread over the entire surface of the heatsink without leaving any gaps. To extend it, you can help yourself with a spreader tool or any spare plastic id card as long as the edges are straight. It is important that you spread the thermal paste layer very well throughout the IHS so that it does not end up overflowing when you place the heatsink on top.
There are users who just put the thermal paste in the center of the IHS and then let the force with which the heatsink is secured to the component be the one distributing the paste. This method is far from being recommended since it leaves important areas of the IHS without coverage.
Maybe in Intel processors that have the die right in the center of the IHS that does not pose too many problems, but in AMD Ryzen processors, whose dies form a vertical strip, this method usually leaves part of the die without paste.
Then there are the heatsinks that have the heat pipes in direct contact with the IHS. In this case, I recommend first putting a little thermal paste between the heat pipes to cover the gap between them and not to form air pockets.
Problems when applying thermal paste incorrectly
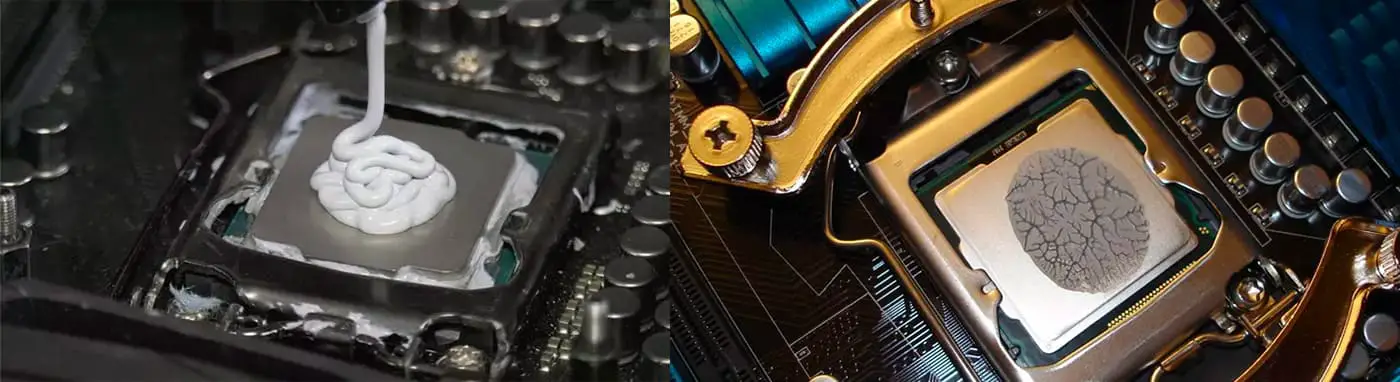
The most common of the problems is putting too much and it overflows down the sides of the IHS. It is not something serious that can be solved by removing the heatsink again, thoroughly cleaning the excess paste on the IHS and the heatsink and reapplying it.
If you fall short when applying thermal paste, a good symptom is the heat of the component will rise since there will not be a good heat transfer between the components. Again, clean and reapply.
How much thermal paste should you apply?
To be able to assess whether you are applying too much thermal paste or too little, it is necessary to know the correct amount of thermal paste to apply. The ideal is to apply a very thin layer, as thin as possible (since the ridges and valleys that are in the IHS and the heatsink are not really too big) but that is totally homogeneous and that covers the entire surface of the IHS.
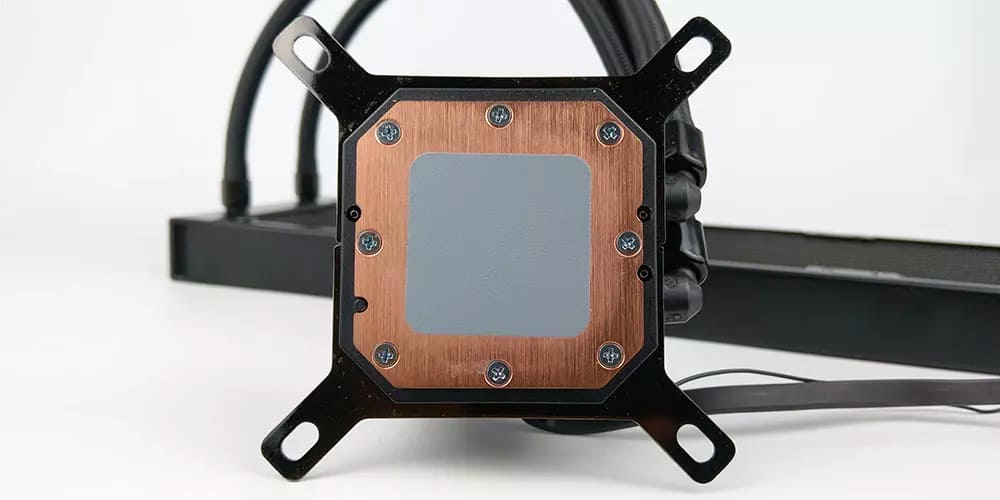
An example of the correct amount of thermal paste that we should apply is in the heatsinks (especially liquid cooling AIOs) that have it pre-applied. Here you can see both the shape and the thickness of the layer that would be ideal to apply:
A trick to know if you have put too much thermal paste is that when you place and press the heatsink in place, on top of the IHS of the processor, you will see that the thermal paste overflows from the sides, a clear indication that you have exceeded the amount. Knowing if you have put too little thermal paste on the CPU is more complicated to know, but if when you put the initial layer you see that they are clear areas and that it is not evenly distributed, you will have a clear clue of it.
How to measure the amount of thermal paste
In most heatsinks there is a maximum pressure that can be applied on the IHS of the processor, generally because the threads of the screws have a stop in order not to damage the processor when tightening too much. This means that the very small distance between the IHS and the base of the heatsink is always the same, and therefore it is impossible to have, for example, a 1 mm thick layer between both components. This means that no matter how much thermal paste you put in, if you install the heatsink correctly there will be no negative effect on the CPU temperature (yes, it would be advisable to clean all the thermal paste that has been expelled out by pressure).
Assuming that we could have a considerable layer of thermal paste between the IHS of the CPU and the base of the heatsink, things would change. To determine this effect we need to know 3 values in total:
- The thermal conductivity of the paste, expressed in W/mK
- CPU area in square meters.
- Thermal paste layer thickness, in meters.
The formula would be the following:
Rpaste = (thickness / area) x (1 / thermal conductivity)
Let’s take an example to see it better. Let’s suppose a thermal paste with a conductivity of 12.5 W/mK with an Intel 1151 socket processor (its dimensions are 29.5 x 29.2 mm, and therefore its area is 0.0008614 m²) and we put it a thickness of 1 millimeter of thermal paste, which obviously we will have put too much. In that case we would have a value of Rpaste = (0.001 / 0.0008614) x (1 / 12.5) = 2.66. If we now repeat the calculation with 0.1 millimeters thick, then the value it gives us is 1.45, so the heat transfer will be much better.
The effect on temperature will vary depending on the processor and the location, size and shape of its die, but essentially you will have temperature spikes that in many cases can be so dangerous that the processor’s temperature protection systems will trip and your computer will shut down.
In conclusion
As we have said before, the ideal is to apply a very thin layer of homogeneous thermal paste on top of the IHS of the processor and that’s it, although there are many supporters of the “grain of rice” technique (leave the pressure exerted by the 2 components coming in contact be the responsible to distribute the thermal paste).
What is clear is that if you use too much thermal paste, the worst that could happen is you being forced to swipe from the sides and clean it (or that if it takes too long until you disassemble the heatsink again, you will realize that this paste has solidified and the heatsink stuck to the processor), but it does not generally have harmful effects in terms of operating temperature. However, if you fall short when it comes to applying thermal paste, it can be harmful or even lethal for the CPU, so it is better to go a little further than to fall short in this case.
More stories like this
- How to remove thermal paste on CPU pins?
- Is it ok to put cheap thermal paste on your CPU?
- How to set CPU priority to prefer foreground Apps in Windows 8.1
- What is Dark Silicon and what is it currently used for?
- Comparison of the Z790 and Z690 Intel motherboard chipsets
- Who leads the battle of the CPUs in 2023?