You can also be interested in these:
- What is the most private browser?
- Google Pixel 7 Pro full review
- Google Pixel 6 will copy Samsung Galaxy S21 features
- Google Play Services keeps stopping: Learn how to fix it
The Nest Thermostat is a widely popular smart thermostat with a variety of systems compatibility and useful features. Some homeowners wonder if they can install the device without a C-wire.
The installation of a Nest Thermostat is possible without a C-wire by utilizing a compatible adapter with your Nest and HVAC system. Adapters can be easily found online for a reasonable cost under $50. The installation process is straightforward and usually takes less than 30 minutes to complete.
Don’t be intimidated by the idea of installing a Google Nest Thermostat without a C-wire. Utilizing an adapter is a simple, affordable solution. Here’s all you need to know.
What is a C-wire?
A C-wire, also known as a “common wire,” provides a constant power source to a smart thermostat by drawing energy from the furnace or heating/cooling system. The steady power supply offered by common wires is highly valuable.
C-wires prevent the need for recharging the thermostat and ensure a stable WiFi connection. Most smart WiFi thermostats require a common wire.
Can I install a Google Nest without a C-wire?
The answer is yes. Installing a Google Nest Thermostat without a C-wire is feasible. Instead, a C-wire adapter, which functions similarly to a standard C-wire, can be used and eliminates the need for complex wiring.
Although Nest claims that a C-wire isn’t necessary, it is still recommended to have one. There are some important factors to keep in mind when using the device without a proper C-wire.
Many Nest Thermostat owners experience difficulties when they don’t use a proper C-wire. This wire ensures that the thermostat can receive continuous power without affecting other components used to turn the device on and off.
Having a proper setup with a C-wire is crucial for maintaining a strong WiFi connection and preventing rapid battery drain. The C-wire improves the thermostat’s performance and avoids common issues such as the delayed message error.
Do all Nest thermostats require a C-wire?
Google Nest Thermostats are designed to work without a C-wire in most cases. However, some systems may need a C-wire for a continuous power source.
Each device and home will have different requirements. You can use the Nest Compatibility Tool online to determine if your system and Nest Thermostat need a C-wire.
What is a C-wire adapter and where to get one
A C-wire adapter serves as a substitute for a C-wire and is used if you don’t have one. These adapters are popular solutions as they save you the time and effort of installing a common wire connection to your HVAC system and Thermostat. You can find many affordable options online for under $50.
Installing a Nest thermostat with a C-wire adapter
If you want to install a Nest Thermostat without a C-wire, a C-wire adapter is a great solution. These adapters are easily available online at a reasonable price and are compatible with a variety of systems, including the Nest Thermostat.
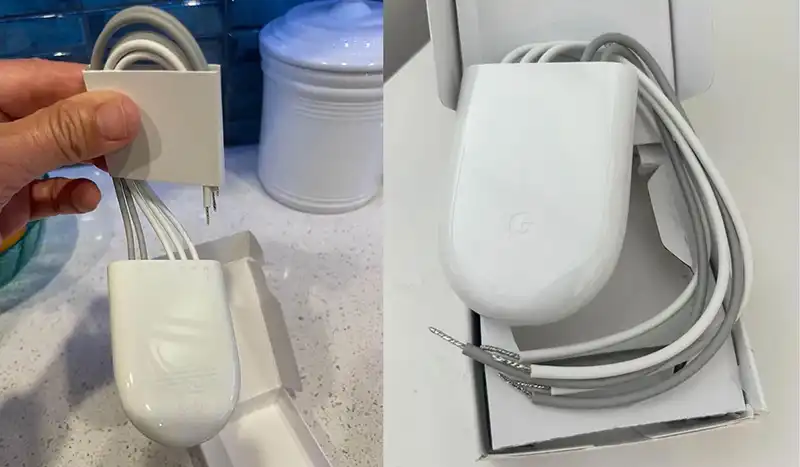
One popular option is the 24 Volt Power Adapter, which comes with a 25-foot cable and is said to be simple to install. Another option is the officially licensed Nest Power Connector, which is also easy to install with clear instructions and the necessary tools.
Before purchasing, make sure the product you choose is compatible with your system to avoid any issues.
Installation steps
Here are the steps to install a Nest Thermostat with a C-wire adapter:
Step 1: Purchase the adapter
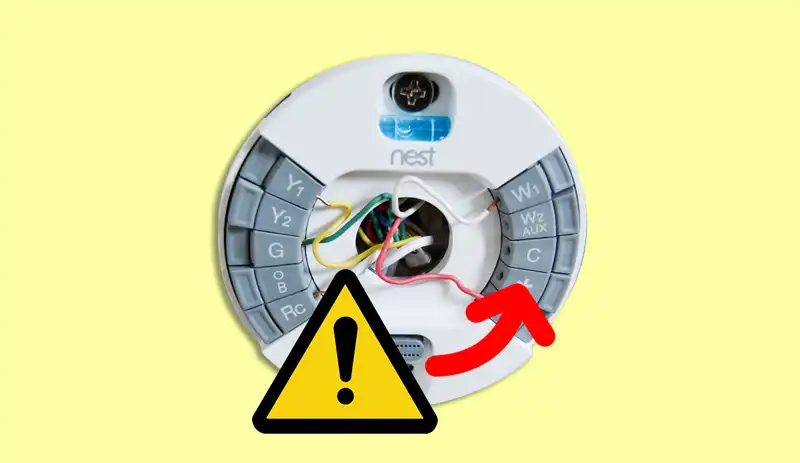
Step 2: Inspect the thermostat terminals on Nest
Once you’ve unscrewed the top of your Nest Thermostat, you’ll be able to see the different terminals. Some of the main terminals to keep in mind include:
- Rh Terminal: Used for power.
- G Terminal: Controls the fan.
- Y1 Terminal: Controls the cooling loop.
- W1 Terminal: Controls the heating loop.
The Rh Terminal is used exclusively for powering the Nest device and completing the electrical circuit.
Step 3: Configuring connections for your Nest thermostat
Now that you have exposed the terminals, you can start installing the Nest Thermostat. Make sure to turn off the power supply to your heating/cooling system before making any wiring connections.
Before removing the old thermostat, take note of its wiring setup. This is crucial as the same wires must be connected to the appropriate terminals on the new thermostat. You can either snap a photo or write down the connections to avoid confusion.
For a heating system, connect the appropriate wires to the W1 terminal to establish a link to your furnace. For cooling systems, connect a wire to the Y1 terminal. If you have a fan, connect a wire to the G Terminal.
Step 4: Installing the adapter to your Nest thermostat
As previously mentioned, ensure the connections match those of your old thermostat, except for the following modifications:
- Disconnect the previous Rh wire and use a wire from the adapter instead to connect it to the Rh Terminal.
- Connect the second wire from the adapter to the C Terminal. The specific wires used for the Rh or C Terminal connections do not matter.
Ensure that the connections between the wires and terminals are secure and correctly placed. Avoid leaving any wire strands exposed outside the terminal and make sure that only the insulation of the wire is visible outside the terminal.
By doing so, you have now established a complete circuit which allows the power from the Rh to the C wire to keep the thermostat continuously energized.
Step 5: Mount the thermostat to your wall
After successfully making the connections, it’s time to hang the Nest Thermostat on the wall. Make sure to keep the power source turned off until the thermostat is in place to prevent short circuits and damage. Though low-voltage wiring minimizes the risk of harm, it’s always better to be cautious.
If you do not have a C-wire or adapter, the Nest Thermostat will charge itself from the wiring of your HVAC system. This, however, can result in issues over time. If installing a C-wire or using an adapter is not possible, there are a few DIY alternatives:
- You can connect the heating wire (W) to the C Terminal in the summer or the cooling wire (Y) to the same terminal in the winter, but this can be a hassle for most homeowners and is not a permanent solution.
- You can attach the fan wire (G) to the C Terminal, but this will not allow you to use the fan alone. The fan will only operate when the HVAC is turned on, which is not ideal for most homeowners.
Final piece of advice
Although these DIY alternatives can be used to connect your Nest Thermostat without a C-wire, they are not long-term solutions and may cause more frustration in the future. The best course of action is to use a C-wire adapter or have a C-wire professionally installed.
This will ensure that your system functions as intended, and you will not need to manually adjust your thermostat throughout the year.
More stories like this
- What is the most private browser?
- Google Pixel 7 Pro full review
- Google Pixel 6 will copy Samsung Galaxy S21 features
- Google Play Services keeps stopping: Learn how to fix it
- Google search is randomly rolling out its dark mode
- Domotics and its application in modern smart homes