You can also be interested in these:
- The Amazon Fire TV Stick 4K full review
- How to fix Vudu playback error: Full troubleshoot guide
- The Hulu error code P-EDU125 and how to fix it
- Is your LG Screen Share not working? Learn why and fix it
These days, streaming shows and movies on Netflix has basically become the defacto way to experience media in your home. Cable TV has slowly begun to lose traction, and other forms of home media like DVDs have become more and more obsolete with time. That does however mean that internet issues that prevent you from streaming have become a bigger issue with time.

One of the most infamous errors to come out of Netflix is error code M7111-5059, which pops out due to alleged issues with your browser or network. As more and more people begin embracing Netflix and streaming culture in general, these problems become more and more ubiquitous, and it can be annoying to deal with when you’re just trying to watch a show.
Today, we’re looking to help you out with this common issue. To be more specific, we’ll be taking a look at what exactly causes this error code to pop-up in the first place, as well as how to solve this little problem when it appears. Hopefully by the end of this article, you’ll be back to watching all your favourite shows! So, let’s get straight into it.
What is the error code M7111-5059?
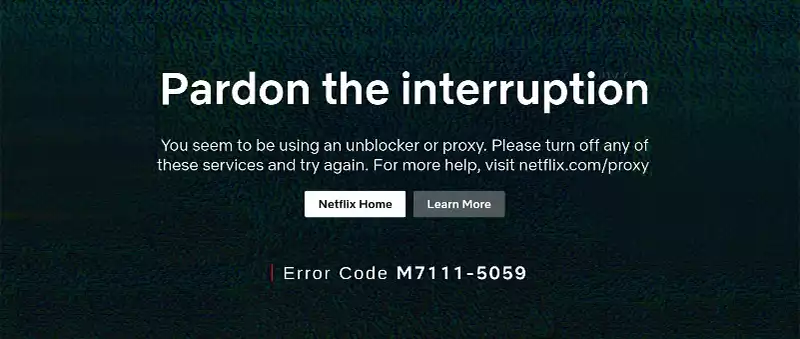
First thing to note is that any Netflix error code that starts with “M7111” indicates some sort of network or browser problem that prevents the video from loading. However, error code M7111-5059 refers to a very specific issue, which is explained pretty aptly by the message that tends to accompany said error code.
“You seem to be using an unblocker or proxy. Please turn off any of these services and try again”

So now we know that error code M7111-5059 specifically refers to the proxy server error that kicks in whenever Netflix detects you using a VPN or some other type of proxy connection. Many people are forced to use Netflix with a VPN to get by the streaming platform’s surprisingly stringent laws and listings in specific countries.
It’s not uncommon for popular Netflix shows to not be available in certain regions, and as such users have resorted to VPNs in order to be able to watch these shows without moving to an entirely different country. This is often the only legal way for viewers to watch these shows, but Netflix unfortunately has chosen to blacklist and block some of these VPN IP addresses. Thankfully, there are several workarounds for this.
Method 1: Change to a VPN that works
Now, one of the easiest ways to fix this issue is to simply swap over to a VPN provider that works with Netflix. Most of the time, the issue lies with the VPN provider not updating their servers, so it’s a good idea to swap when you can if you start facing this problem. So, what VPN providers do we recommend?
Generally, your best bet is to go with one of the bigger and more reliable providers. This can range from hugely popular VPNs providers like ExpressVPN all the way to more underrated picks like IPVanish. Other alternatives like Surfshark, NordVPN and CyberGhost all work fine as well. Most of the time these services offer a trial period, so take advantage of that to test things out.
Of course, we’re sure some users aren’t exactly looking to swap out their VPN provider, so in that case, we have some other options you can try.
Method 2: Change your VPN server
When you’re running your VPN server through an area with high amounts of traffic, you may find yourself facing this error more often. Therefore, one of the easiest ways to fix this issue is to simply change the server you automatically connect to. To do this, restart your VPN and then keep an eye on which server your VPN redirects you to by default.
Then, instead of going with the normal pick that the VPN chooses, pick a different server that’s a bit away from your common IP while still providing decent and reliable coverage. This can help get away from geoblocking issues that are common with Netflix. Then give it a test and see if things working fine. If it solved things, great! If not, move on to the next method.
Method 3: Clear your cache and cookies
Every time you log into Netflix, the service checks your IP, cookies and browser cache. If it sees information that doesn’t exactly match up, it generates the M7111-5059 error. This can happen no matter what VPN or server your on, so the only way to really fix this is to close your browser, restart your VPN and then update your browser.
You’ll also want to go into your browser’s settings and then clear out your browsing data. This includes browsing history, Cookies, site data, cached images and other files. Once you’ve cleared everything, you can then test Netflix all over again. This can also be caused by your mobile app, so uninstall it before trying again.
Method 4: Switch VPN protocol
Every popular commercial VPN comes with a bunch of encryption protocol options. You can change these over in the settings and preferences. Usually, once you find the protocol settings in the VPN settings, you’ll want swap over to OpenVPN or OpenVPN UDP instead. From there, all you need to do is restart your VPN.
Every VPN provider will have a different set of options for changing this, so it’s important to really go through your settings and cross reference things with your provider. It’s nothing too complicated thankfully, so once you get the gist of things, it should all come to you naturally.
Conclusion
After following all these steps, you should be good to go! Netflix can be quite problematic with their errors and stances on VPNs sometimes, but keep in mind that it’s not too tough to fix as long as you know what you’re trying to achieve. Having a VPN is generally a good idea these days, and it’s basically a necessity with Netflix sometimes, so we hope you have fun!
More stories like this
- The Amazon Fire TV Stick 4K full review
- How to fix Vudu playback error: Full troubleshoot guide
- The Hulu error code P-EDU125 and how to fix it
- Is your LG Screen Share not working? Learn why and fix it
- Xiaomi TV stick 4K full product review
- Make your PC to boot automatically after a power outage