You can also be interested in these:
- Is my computer Windows 11 compatible? Find out easily
- How to change the language in Windows 11
- How to install DirectX in Windows 11
- Is my Asus motherboard Windows 11 compatible? Find out!
Programs that execute on their own at the beginning of your Windows 11 session? This can have a huge impact on the time you have to wait for the Windows Startup sequence to complete and even in your overall Windows 11 PC. Learn how to speed up your Windows 11 booting sequence and get rid of all those unwanted programs and bloatware.
Countless times, we install applications on our computer for casual use, or to solve a quick situation. However, the way these installers are program can determine if they will end up included in the list of apps executing in the boot-up sequence, or running perpetually in the background, even if we don’t want to. This is the case with One Drive.
Having unnecessary software opened and active at all times causes a considerable burden to our computer, eating up valuable resources that reduce the performance. Here is what we can do to streamline our Windows 11 booting sequence and speeding up the processing time of out computer.
Remove unwanted programs from the Windows 11 Start-up list
First, we have to know what are the programs that fire automatically when Windows 11 starts. If you follow these steps, you will find this out immediately:
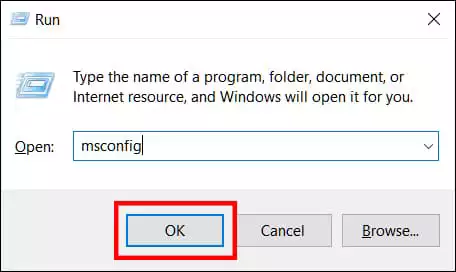
- We open the start menu, and type “msconfig”, to search this query. From the list that pops up, we select “System configuration”. Alternatively you can press “Windows flag” key + R key, type msconfig and click “OK”.
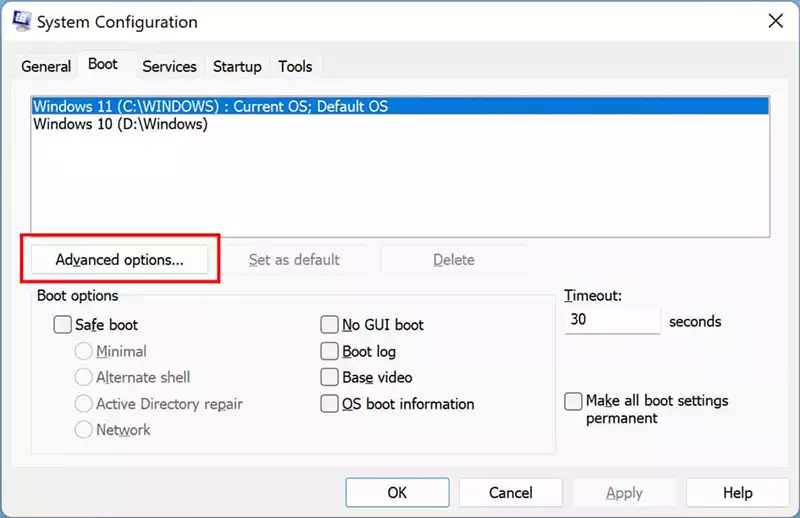
- Go to the “Boot” tab and select “Advanced Options”.
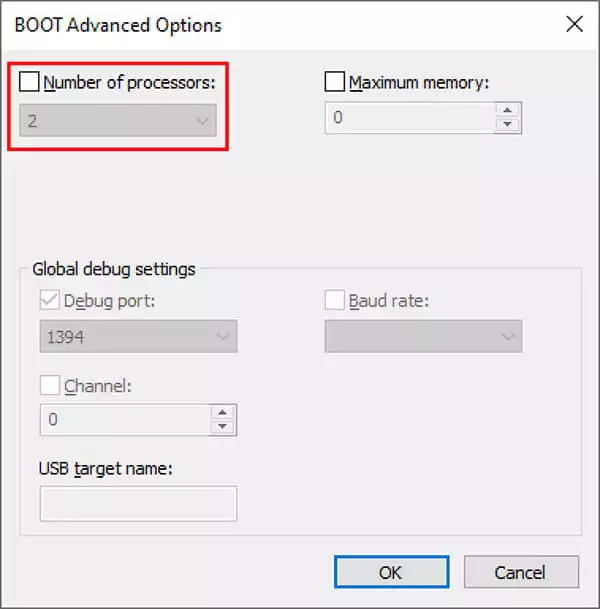
- Select the box “Number of processors” and select the maximum. You don’t have all those as computer processing units, nor they are CPU cores: the maximum number represents the amount of threads that your CPU is able to run. We would like to point out though on this item, if you don’t activate the checkbox Windows will assign the maximum processing capacity available for booting. That being said, if you set an specific amount, you might be limiting the overall performance.
- Next, go to the “Services” tab and left click on the “Manufacturer” column to see the services of other installed applications other than Microsoft. The idea is that services that are not necessary are stopped, such as the Google Update service, for instance.
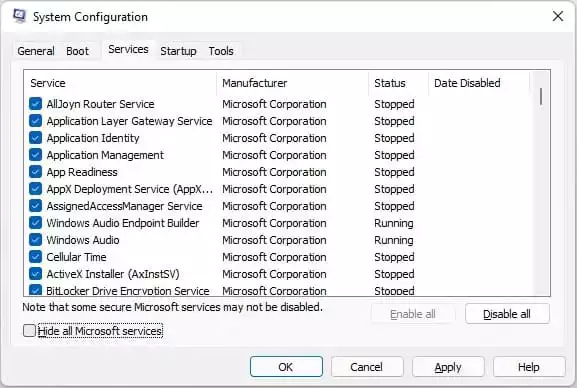
- We do not recommend stopping the services, programs or applications that have to do with drivers or peripherals that you use frequently. For example the printer services (HP, Epson, etc.) and NVIDIA or AMD, responsible for all the functionality of our graphics card.
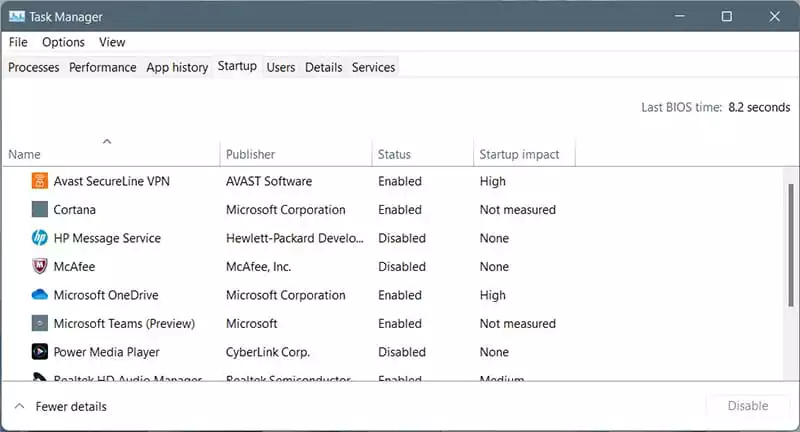
- Then, we go to the “Windows Start” tab and open the Task Manager. Here we recommend disabling OneDrive, Teams and as well as any other application that you do conscientiously not use much. These applications they will slow down considerably the Startup. To disable a Startup program, just right-click on it and select “disable”.
- When you have finished making the adjustments, you will see a warning message about restarting the PC so that the changes take effect. You can do it immediately or leave it for later; what is clear is that the next boot will be faster.
Getting rid of those Windows 11 background programs
We have already seen how to change the Startup configuration settings in Windows 11 to make it faster, but we will still have applications running in the background and those will not only affect the start up sequence, they will consume our computer resources for as long as they keep open in our system. These programs are from Microsoft, so we show you how to disable them (in case you don’t use them):
- We open the start menu and go to Settings.
- We go to “Applications”, then “Applications and Features” and we are going to look for applications such as the following: Opinion Center, Cortana, Mail, Solitaire, Teams, etc. (Windows bloatware, basically).
- Once found, we left click on the 3 vertical points and click on “Advanced Options”.
- Go to “Background application permissions” and select “never”.
- Another detail that we have seen is that Windows 11 grants many permissions to applications that we do not even know are installed. Going back to the previous point, you will see all the permissions activated for these applications and we bet you have never used many of them.
Disables transparency, animations and effects (less powerful computers)
There was a visual theme in Windows Vista that got famous (or hated) because the amount of resources it needed to allocate in order to run. This Windows theme was called “Aero”. We can undeniably say the gap between good aesthetics and bad performance can be as narrow as how well balanced an operative system can be.
The user interface (UI) of Windows 11 has been optimized and nowadays is not a problem to run the interfaces with a considerable number of effects. However, a system must be optimized for the likings of a wide audience, accommodating a rather large number of settings.
- We return to “Settings”, but now we will go to “Personalization”.
- Within this menu, simply deactivate “transparency effects”.
- To disable animations and effects do the following:
- Within “Settings”, we go to “System” and then to “About”.
- Now, we go to “Advanced system configuration”, a “System properties” a dialog box will open and we will go into “Configuration”, right where it says “Performance”.
- At this point, you can do two things: uncheck the boxes that interest you the least or choose the “Adjust to get the best performance” profile.
Disable notifications
This is a more personal decision, but one that is again suitable for people who have a slow performance in their system. Similarly, slow computer performance and booting times may arise for reasons other than Windows 11, so take a look at our tutorial on it before continuing.
Remember that installing the OS on an HDD will provide us with a very slow experience, so it is always advisable to do it on an SSD. With that said, we continue:
- Again in “Settings”, we go to “System” and then to “Notifications” .
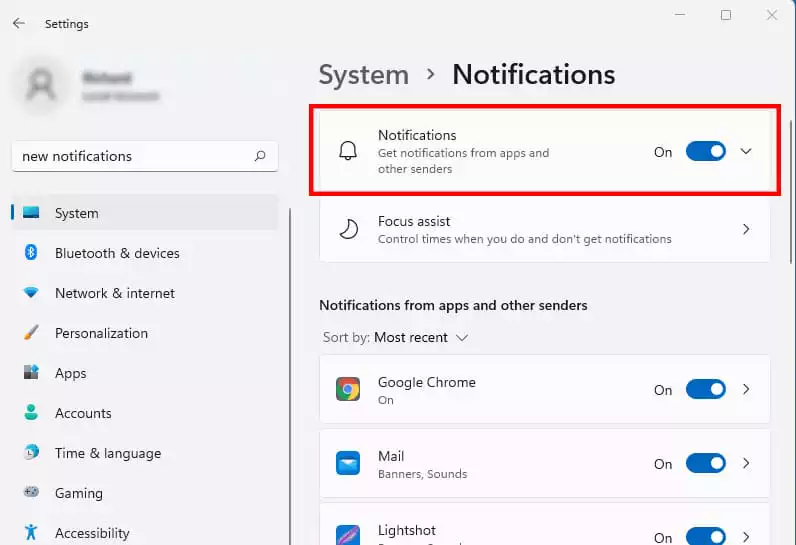
- It is enough to deactivate them by unchecking the option, although if you don’t want them all gone, you can deactivate them individually depending on the application.
- Also, disable the options below about offering suggestions on how I can configure my device or get tips and advice when using Windows. Again, this depends on your likings, if you find these options useful, then you don’t have to remove them.
If you don’t use OneDrive, uninstall it
One Drive is one of the Windows 11 applications that runs automatically in the system. This can be fixed easily following the steps of our first solution, going through the Task Manager. However, the most annoying thing about this installation is that it syncs your content unless you deactivate this completely.
Every time One Drive tries to sync our content the system wastes valuable network and CPU resources
The problem is not only that it runs automatically, but that it constantly synchronizes our files, wasting network and CPU resources. You can tell if this App is active by the cloud icon logo in the task bar.
You can configure it to pause it, for a temporal solution, or you just can solve this for the rest of your life by uninstalling it. To do this, it is simple: you have to go to the settings menu -> applications and search for OneDrive and then uninstall it.
More stories like this
- Is my computer Windows 11 compatible? Find out easily
- How to change the language in Windows 11
- How to install DirectX in Windows 11
- Is my Asus motherboard Windows 11 compatible? Find out!
- The definitive minimum spec requirements for Windows 11
- How to fix the computer has rebooted from a bugcheck error