You can also be interested in these:
- How to change your security PIN in Samsung devices
- How to connect Samsung Galaxy Note 8 to PC
- Full honest Samsung Galaxy Tab A6 review
- Google Pixel 6 will copy Samsung Galaxy S21 features
Samsung smartphones are some of the most popular devices on the market, and that’s not even hyperbole. The company commands a great lead over almost all their competitors worldwide, and their devices are omnipresent on the smartphone market. This includes the Samsung Galaxy S8, the topic of our guide today.
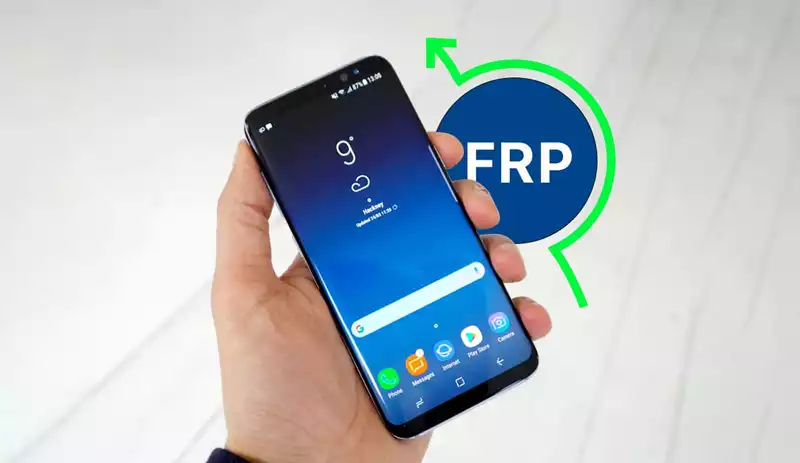
In Android 5.1 Lollipop, Google introduced Factory Reset Protection or FRP, a security function that ensures that if your smartphone gets stolen, the robber won’t be able to start using it after a single reset. How it works is that after a factory reset, the smartphone retains knowledge of its user’s Google account, and will require the user to input their Google password before continuing.
Issues arise when users forget their Gmail passwords. After all, nowadays a lot of information gets instantly filled in thanks to Google’s own autofill functionality, and sometimes you just can’t figure it out. Don’t worry, we’ve got you covered, with our guide on how to perform a Samsung Galaxy S8 FRP bypass without a computer.
Steps to do a Samsung Galaxy S8 FRP bypass without a computer
We’ll be giving you a thorough break down of every single step involved in the process, so make sure you follow every single step exactly as described. This is very important, make sure you understand what to do before you start pressing buttons! Keep in mind that your device can get permanently bricked or damaged from trying this, so proceed at your own risk.
1. Connect your Samsung Galaxy S8 smartphone to Wi-Fi
First, you’ll want to make sure your Samsung Galaxy S8 is connected to a Wi-Fi network. It’s pretty simple, so we won’t go into detail on how to connect to Wi-Fi.
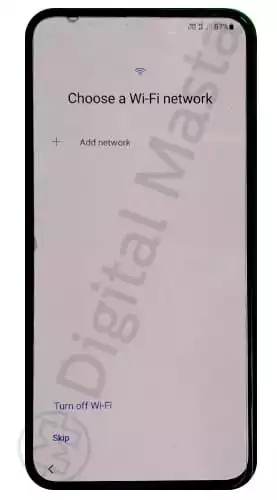
2. Go back to the Samsung Welcome screen
Now that you’re finished with connecting Wi-Fi, return to the Samsung Welcome screen that you started on. This is where the guide really begins, so make sure you’re prepared for it.
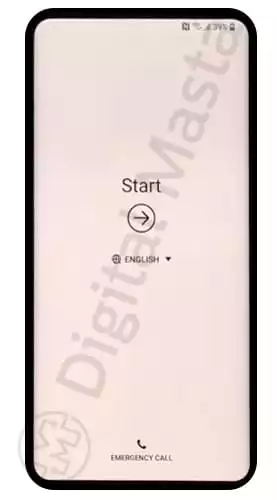
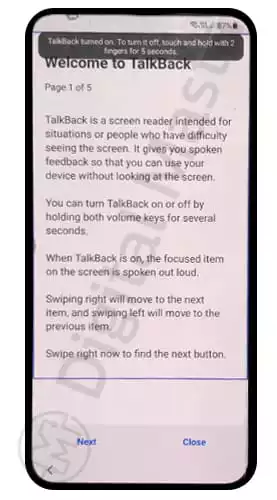
3. Tap your Samsung Galaxy S8’s screen with two fingers to Turn On TalkBack
As the step describes, you’ll want to tap the screen with two fingers. This allows you to turn on Android’s TalkBack functionality, which is a crucial step to success in this guide.
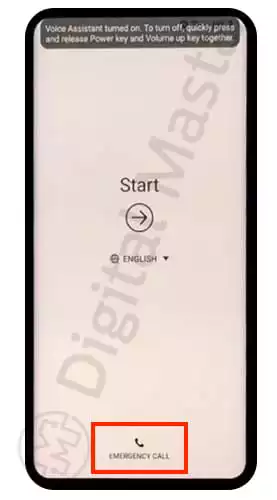
4. Click on the “Emergency Call” button at the bottom of the screen
At the very bottom of the screen, you’ll see a little icon for making emergency calls in case the situation is dire. We’ll be making use of this to exploit the security a little. Click on it, and it should bring up a little dialer, complete with numpad and options.
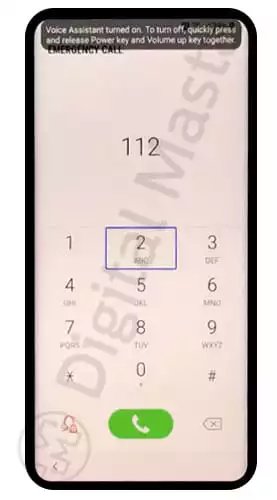
5. Dial and call the number 112
As the step describes, simply dial in 112 on the dialer and make a call to the number. Then, quickly proceed to the next step.
6. Double tap on the + icon
Self-explanatory: Locate the + icon during the dial up and double tap it.
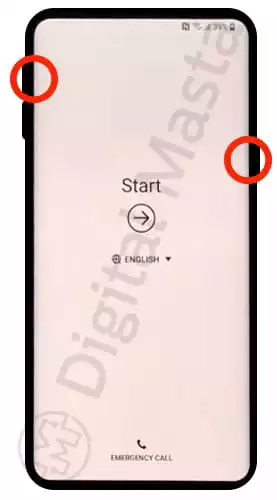
7. Press your Power button and Volume Up button at the same to to turn TalkBack off
Alright, this step needs to be done quickly. Press the Samsung Galaxy S8’s power button and volume up at the same time, and hold them for a short period of about three seconds, then let go. This will turn off TalkBack, which we need to do in order to continue.
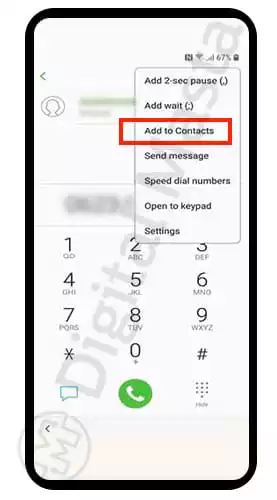
8. Tap the ‘Add to Contacts’ button in the menu
Tap on the triple dot icon in the top right of the screen to bring up a menu. Inside, you’ll find the option ‘Add to Contacts’. Press that, add the new contact under any name and save it.
9. Tap on the contact you just saved
Go to the saved contact and tap on their name to bring up the contact options.
10. Send a new message that says “www.youtube.com” to the contact
As the step described, send to the new contact a message that says “www.youtube.com”. You don’t need to capitalize anything, just make sure it says “www.youtube.com”.
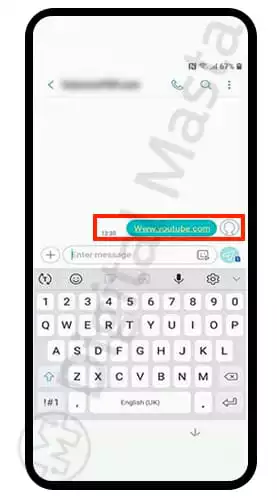
11. Tap on the message to open the YouTube app
Once the message is sent, you can proceed to tap on the message you just sent, and that’ll open up the YouTube application. Then, move on to the next step.
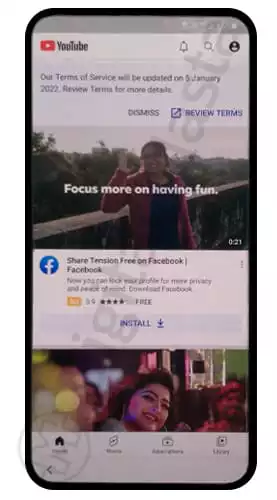
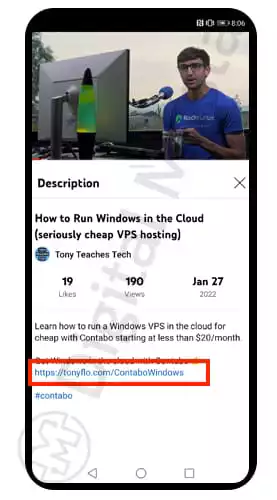
12. Find a video with a link and open it with Chrome
You’ll want to now search for a video with a link in its description and click on it. This will give you the option to open it in Chrome, select that.
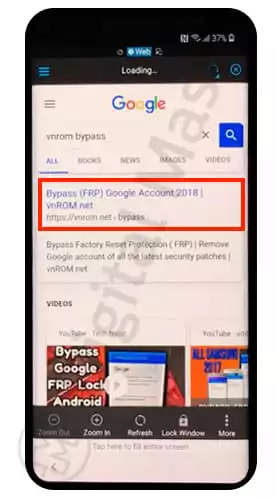
13. In the Chrome address bar, search for “vnrom bypass” and click the first result
Once you’re in Chrome, search the topic above and a list of results will come up. The url you will access should be the first on the list, but to be on the safe side, open the one from “https://vnrom.net”. You will download the Apex Launcher APK and FRP vnROM APK, those are the only essential ones so ignore everything else.
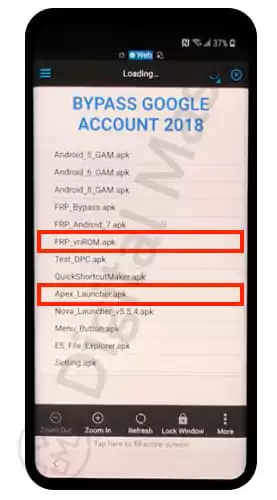
14. Go to your Google Chrome Download History and Install Apex Launcher
As instructed, go to your download history and install Apex Launcher. This allows you to bypass the need to unlock the screen to access basic apps.
15. Open your Settings and go to the Apps section
Head into your Settings application and go straight to the apps section. We’re going to be clearing out data on Google Play Services to overwrite the data inside the smartphone this way.
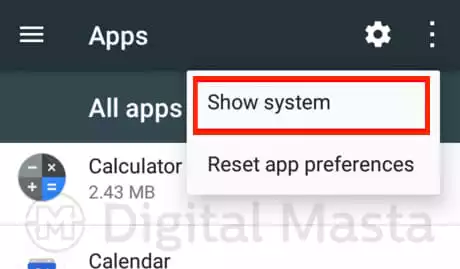
16. Press the dot menu and select Show system apps.
Inside the apps menu, you’ll see a three dot menu in the top right. Press it and select “Show System Apps” to make the Google Account Manager show up.
17. Find the Google Account Manager
Locate the Google Account Manager and enter its settings.
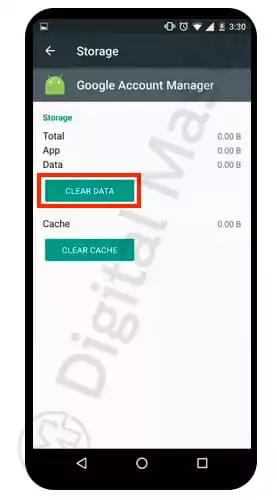
18. Head into the app’s storage, Clear Data and then Disable it
Inside the settings for the Google Account Manager, choose the storage option, clear its data and the disable the application. Now go back to the apps list.
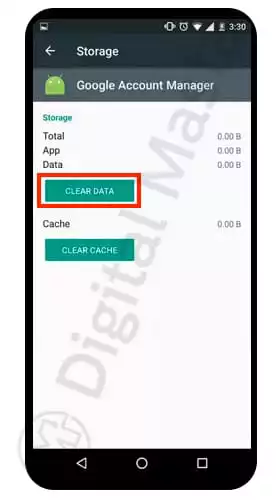
19. Find Google Play Services, Clear Data and then Disable it
Locate Google Play Services, and do exactly what you did in the previous step to it. This removes any trace of Google interference in your device.
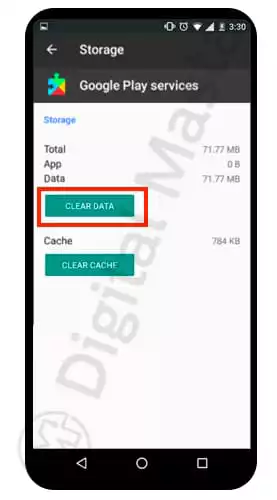
20. Install the FRP vnROM APK downloaded earlier
Now it’s time to install the FRP vnROM APK from earlier. This app is what allows you to bypass Google’s FRP settings.
21. Return to the main Settings Menu and find the Accounts option
Go back to the main Settings menu and navigate it until you find the Accounts options. Tap it and head in to add a brand-new Gmail account.
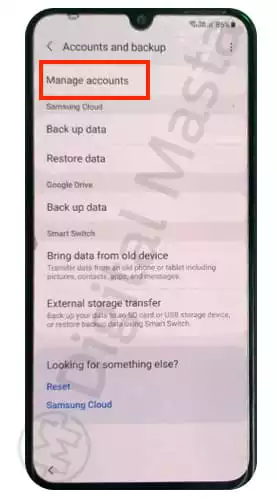
22. Sign in with your Google account
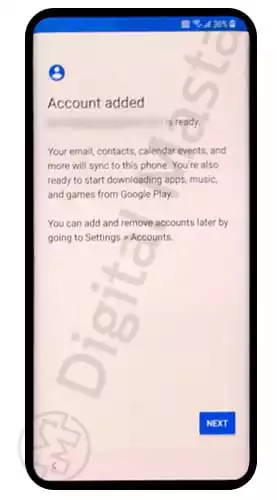
Choose to add a new account, sign in with your Google account and then confirm it.
23. Re-enable Google Play Services in the Application settings
Now that you’ve signed in, find your way back to the Applications settings, find Google Play Services and re-enable it so that you can use Google applications again.
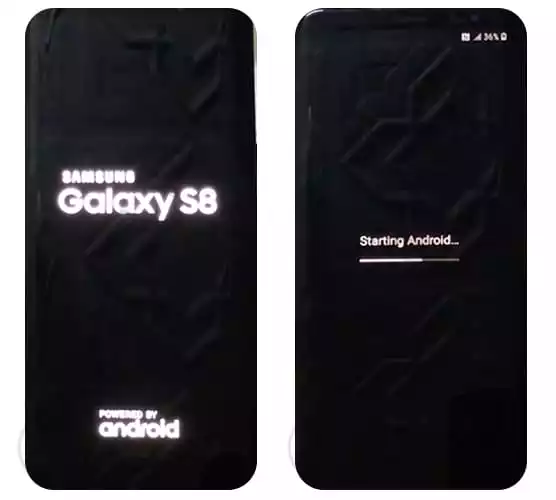
24. Restart your Samsung Galaxy S8
Everything’s finished, now all that’s left is to restart your smartphone and you’ll be greeted by a full prepared smartphone that’s been successfully been bypassed.
Conclusion on bypassing the FRP on a Samsung Galaxy S8
We hope this guide helped you regain use of your Samsung Galaxy S8. Losing control of your smartphone is an awful feeling, so we’re happy we can help you get it back.
More stories like this
- How to change your security PIN in Samsung devices
- How to connect Samsung Galaxy Note 8 to PC
- Full honest Samsung Galaxy Tab A6 review
- Google Pixel 6 will copy Samsung Galaxy S21 features
- Samsung Galaxy A52, A52 5G and A72 almost high-range
- Samsung Galaxy S22 Overview